The Posts Block allows you to showcase a collection of posts on a single page, allowing you to customize and streamline post display based on categories, taxonomies, or tailored criteria..
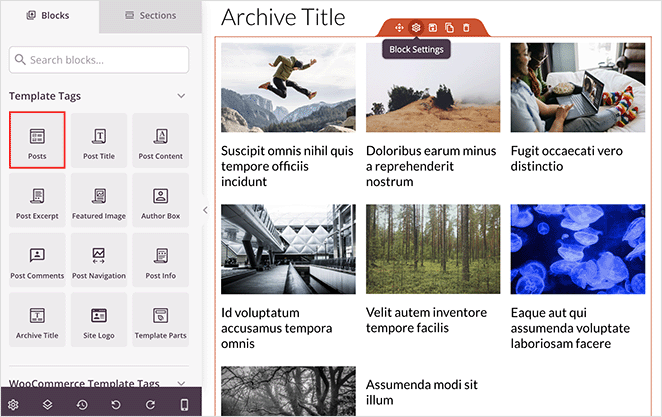
Adding the Posts Block to Your SeedProd Pages
Follow these steps to integrate the Posts block on your SeedProd pages:
- Go to Blocks > Advanced, and drag and drop the Posts block onto your page.

- Click on the Posts block to access its settings. In the Content tab, you can customize your Posts Query and Layout settings to tailor the display according to your needs.
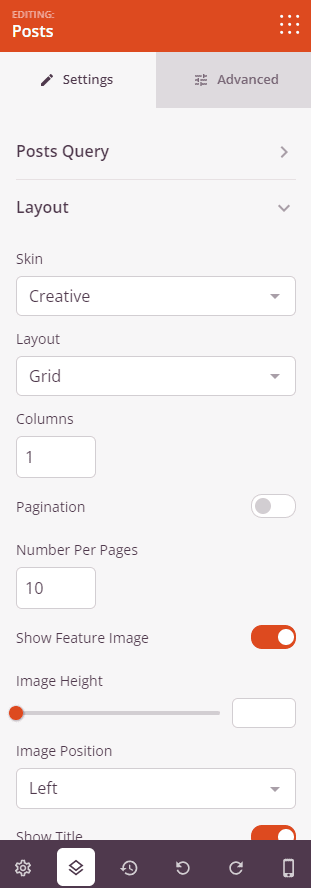
- Post Query Settings
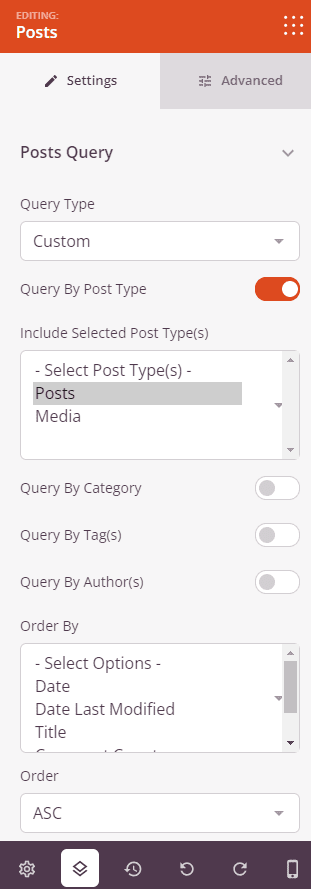
Query Type: Choose from three distinct options to tailor your post display. ‘Default‘ uses the existing query parameters, ‘Custom‘ lets you create a personalized query, while ‘Manual‘ enables you to input your own query string parameters.
Query by Post Type: Enable this feature to handpick the types of posts you wish to display. Note that this option is exclusively available when you’ve selected the ‘Custom’ query type.
Query By Category: Activate this setting to filter posts based on one or more categories within your selected post types. This filter is only accessible when using the ‘Custom’ query type.
Query By Tag(s): Turn this on to refine your post selection according to specific tags within your chosen post types. This feature is solely available with the ‘Custom’ query type.
Query By Author(s): Enable this to showcase posts by selected authors. This filtering option is only open when you opt for the ‘Custom’ query type.
Order By: Sort your posts based on different criteria including Date, Last Modified Date, Title, Comment Count, or Menu Order.
Order: Arrange your displayed posts in either ascending (ASC) or descending (DESC) order to suit your presentation style. - The Layout Settings section provides options to fine-tune the visual presentation of your posts.
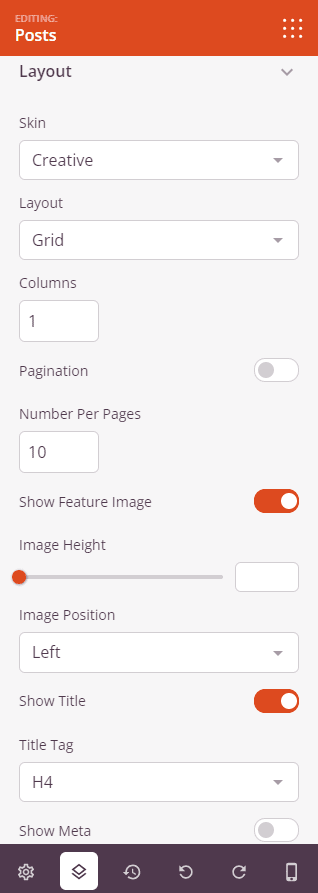
Skins: Classic, Card, Creative, Minimal
Layout: Grid, Masonry, Carousel
Columns: Customize the layout by specifying the number of columns in which posts will be displayed.
Pagination: Choose to enable or disable pagination to help visitors navigate through the list of posts.
Posts Per Page: Determine the number of posts displayed on each page for a more controlled viewing experience.
Featured Image: Opt to display or conceal the featured images of posts, enhancing visual engagement.
Title: Toggle the visibility of post titles based on your presentation preferences.
Meta Information: Decide whether to display or hide metadata elements such as Date Modified, Author, Date, Time, and Comment Count.
Excerpt: Display a brief summary of each post, with the added flexibility to set your desired excerpt length.
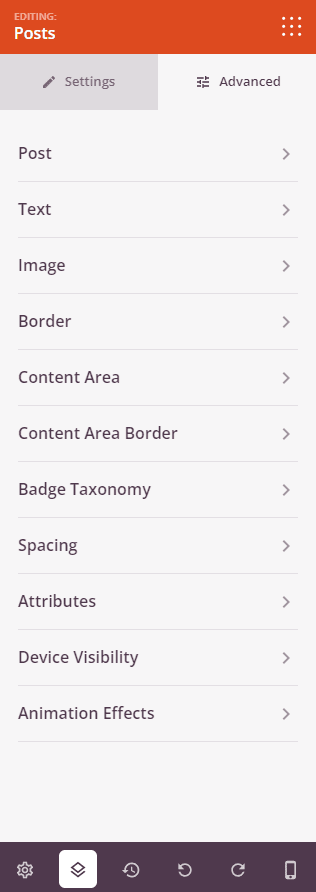
Read More Link: Include or omit the “Read More” link, offering readers a pathway to the full post. - Within the Advanced tab, explore styling controls for posts, text, images, borders, content areas, badges, spacing, attributes, device visibility, and animation effects.
- Once you are satisfied with the layout and settings, remember to save or publish your work.
That’s it! By using the Posts block, you can elegantly display your posts on your web pages, providing readers with a visually engaging and organized post viewing experience.
