Do you want to know how to add a click-to-call link to WordPress? Many businesses use this approach to make it easier for mobile users to get in touch. And with more people using mobile devices, it’s a simple way to better serve your customers.
In this article, we’ll show you 3 easy ways to add a tap-to-call button to your WordPress website.
Why Make Phone Numbers Clickable in WordPress?
Most businesses now communicate with customers online through live chat, support tickets, email, and contact forms. But when people have specific questions or need help, they often prefer to speak to a human being. That human connection makes them feel listened to on a personal level and can increase customer satisfaction.
So from a user’s point of view, being able to quickly tap to call saves them a heap of time. Instead of having to send emails back and forth, they can speak to someone almost instantly.
How Does Click to Call Work?
Click-to-call, which is sometimes known as click-to-talk, refers to when a user clicks a button or text to connect with someone else in real-time. So when you enter your number to connect a call, a go-between service uses the tel protocol to dial the business you’re trying to reach in order to start a conversation.
You also don’t need to download any software to use click-to-call technology. You simply use the device you have to hand.
How do You Hyperlink a Phone Number?
For businesses just starting out, it’s worth checking out a few business phone services. That way, you can tap into a whole host of features, including:
- 転送電話
- Number sharing
- Answer calls from anywhere
- Track call usage statistics
- VoIP services
Let’s get started!
Option 1: Create Clickable Phone Links With a Plugin
This option makes use of a WordPress phone number plugin to add clickable call links to your site. The WP Call Button plugin is easy to use and allows you to add call buttons to the following areas of WordPress:
- Posts and pages using both the classic and block editor in WordPress.
- Sidebars and widget-ready areas with the built-in widget.
- Anywhere else on your site with floating buttons that scroll with the user.
With this in mind, let’s look at the steps involved to get set up.
Step 1: Download and Install WP Call Button Plugin
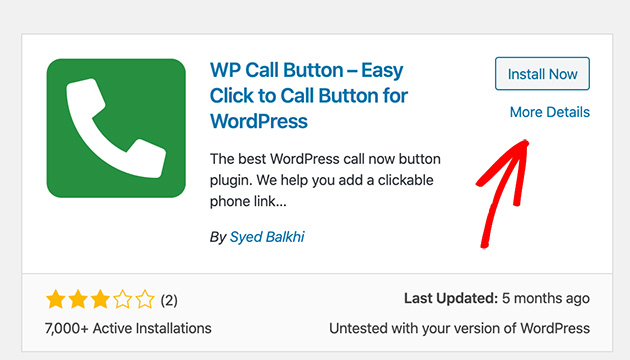
The first thing to do is download the WP Call Button plugin and upload it to your WordPress website.
If you’re not familiar with how to do this, check out this step-by-step guide for installing WordPress plugins.
Step 2: Configure the Settings for Sticky Call Buttons
With the plugin installed and activated, head to Settings » WP Call Button to begin configuring the plugin settings.
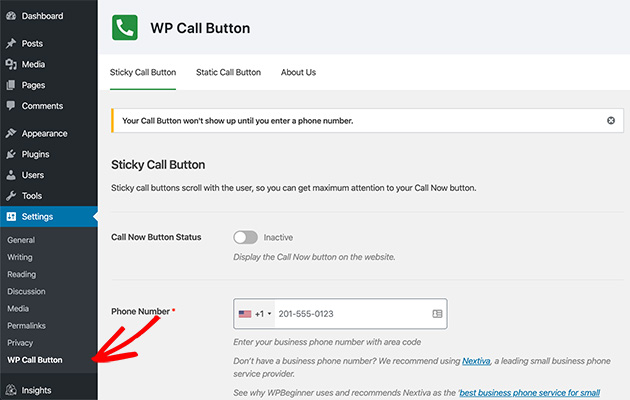
There are 2 ways to display your phone number buttons with this plugin which include Sticky Call Buttons and Static Call Buttons. The sticky buttons scroll as users scroll down your site, while static buttons stay in one place.
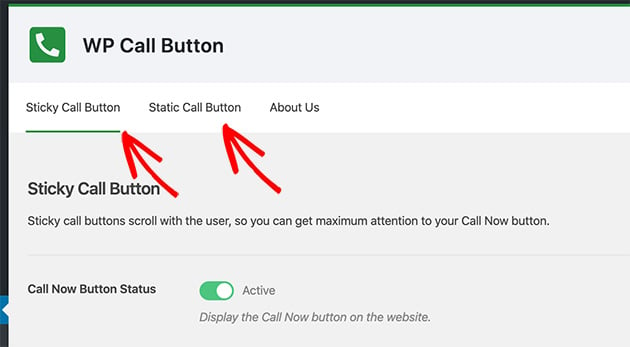
The default settings page includes the following common settings for creating a Sticky Call Button:
- Call Button Text – What your hyperlinked phone number will display as.
- Button Position – How the sticky call button appears on your site.
- Call Button Color – Choose a color for your call button.
- Visibility – Choose to hide the button on certain pages.
There’s also the possibility to only show your call button on mobile devices, which is useful for sites wanting to optimize their mobile user experience.
To make use of these settings, enter your phone number into the text field indicated at the top of the page.
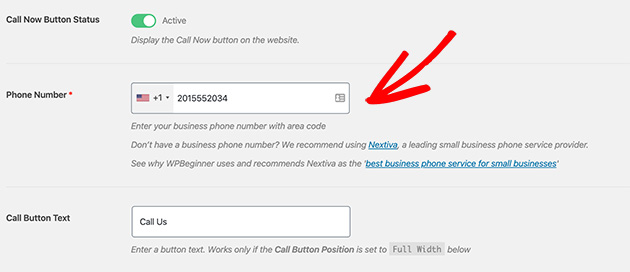
The smartphone field lets you choose your country from a dropdown list and will automatically add your country code in the correct format.
Then go ahead and set the button placement, color, and visibility settings.
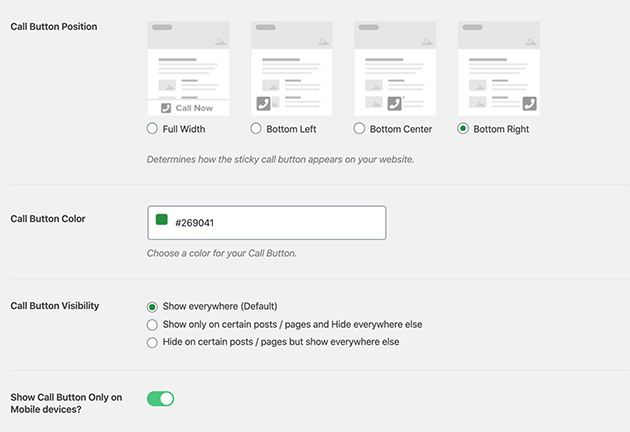
By default, a click-to-call button is added to all pages on your website. But as we mentioned above, you can select specific pages for it to show or for the button to display on mobile pages only.
When you’re happy with your settings, set the Call Now Button Status to Active and click Save Changes. You’ll then see your call now button live on your website.

Step 3: Set the Static Call Button Settings
If you’d like to include static click-to-call buttons in WordPress, choose the Static Call Button option from the settings page. Here you can again set the button text and color, as well as choose to hide the phone icon from the button.
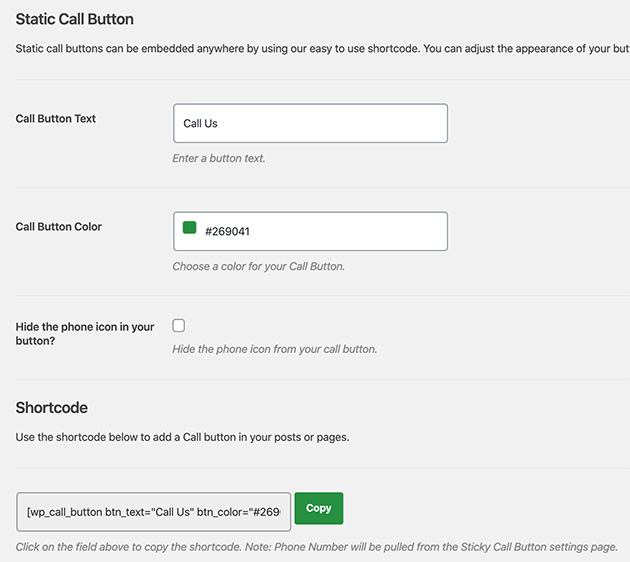
Where these settings differ, however, is with how you publish the button on your site. Users of the classic WordPress editor can copy a generated shortcode and paste it into a post, page, or widget.
While with the modern WordPress editor, you can use the built-in WordPress block.
Step 4: Publish your Static Phone Call Button
Let’s take a look at how to publish your click-to-call button using a WordPress Block.
First, open up the post or page where you’d like to add the phone number or choose Pages » Add New from the WordPress admin area.
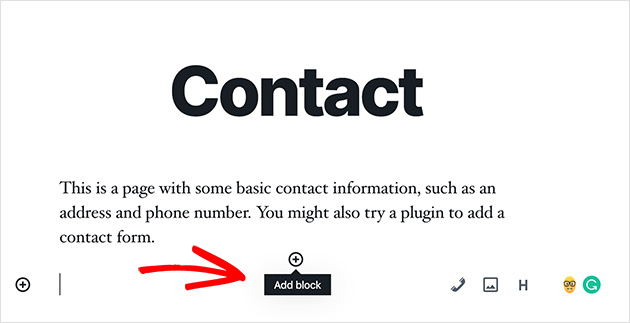
Then click the plus icon to add a new WordPress block to your page.
Next, select WP Call Button to add it to the page.
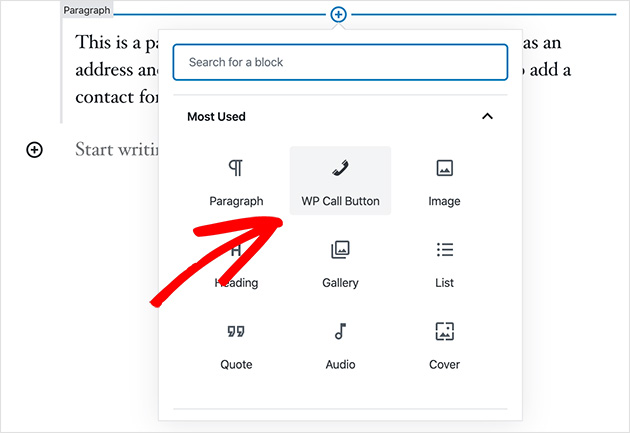
When you click it, you’ll see options on your right-hand side for changing the button color, font size, position, and more.
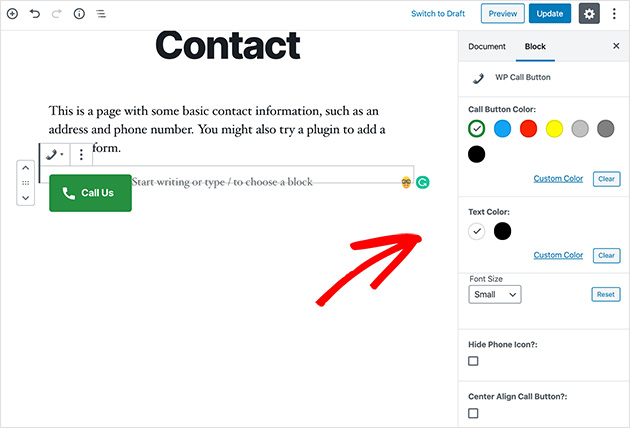
Click Publish when you’re satisfied with the layout. Then when you navigate to that page, it will look similar to the example below.

Step 5: Add a Click-to-Call Button with a Widget
The last step is for site owners who want to add a clickable phone number to widget-ready areas in WordPress.
To do this, head to Appearance » Widgets. Then choose a sidebar area, click the plus (+) icon to search for the WP Call Button widget, and click to add it to your sidebar.
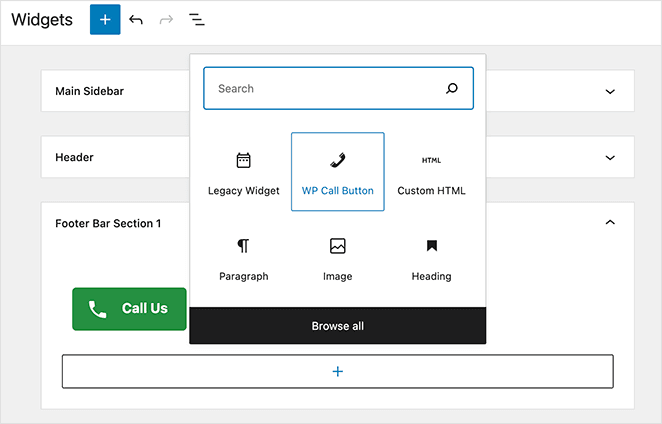
Then edit the title, description, button color, etc.
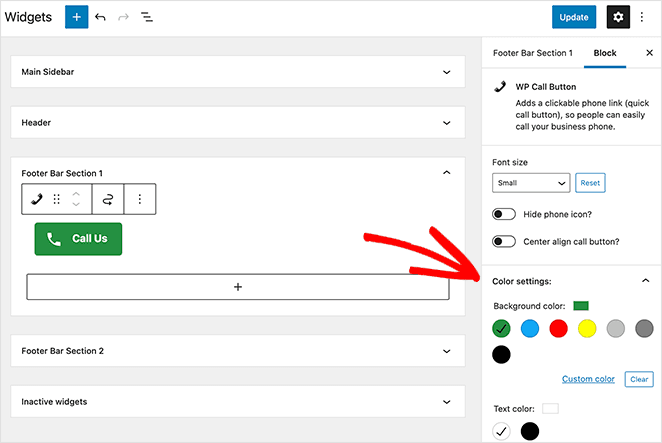
Save your settings and click Done. And when you navigate to your site, it’ll look similar to the image below:

As you can see, using this WordPress plugin is one of the easiest ways to allow site visitors to click and call you from web and mobile browsers. Not only is it 100% free, but it also seamlessly integrates with Google Analytics.
Then you can connect it with MonsterInsights to track the number of people who click to call you, as well as which pages bring in the most leads. Plus, all of this can be done without having to leave your WordPress dashboard.
But what if you want to make use of this technology without having to use WordPress plugins? The next option explains how.
Option 2: Add a Phone Number Link with HTML (Manually)
To manually add clickable telephone numbers and links to your WordPress website can be as simple as copying and pasting a simple code snippet.
This option uses an HTML code snippet that opens phone links on mobile apps, mobile devices, PCs, and Mac computers. On a Mac, the link will open in Facetime, while in Windows 10, it will open on Skype.
First, open the post or page where you’d like to add your phone number. For this example, we’ll use an existing post which we’ll edit.
If you’re using the new WordPress editor, add a new HTML block.
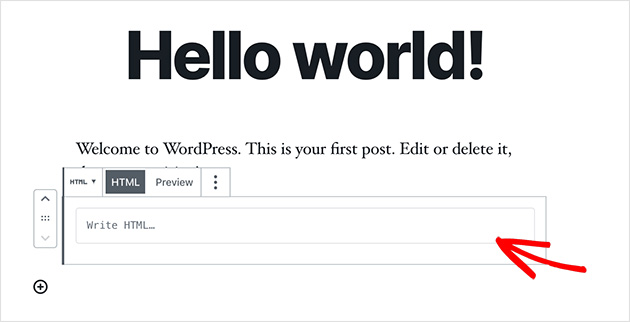
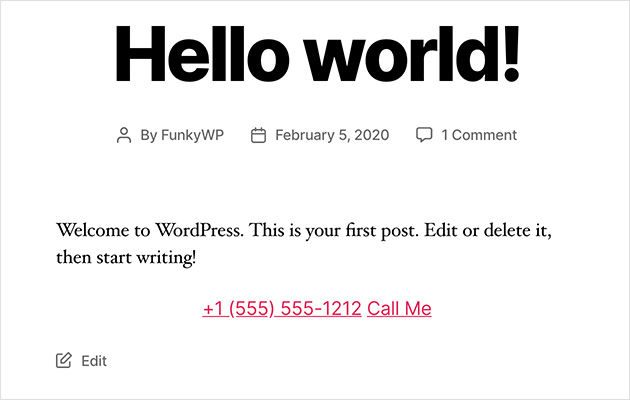
Then copy the following code snippet and paste it into the HTML block.
 <!--This link will work on Android and iPhone. It will be visible to desktop users but will result in an error when clicked -->

 <a href="tel:+15555551212">+1 (555) 555-1212</a>
 <a href="tel:15555551212">Call Me</a>
Then click Publish and navigate to the live post to see the results.
Option 3: Adding a Phone Link in the WordPress Header
It’s also fairly easy to add your phone link in the WordPress header or navigation menu.
To do this, go to Appearance » Menus and click Custom Links from the right-hand column.
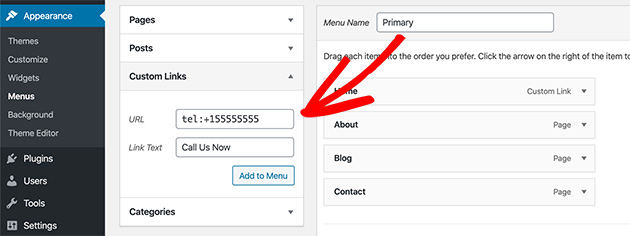
Then in the URL field, add your phone number in the following format:
Tel:+155555555
And in the Link Text field, type the label you’d like to give your call link. Then click the Add to Menu button and Save Menu to make it live on your website.
Here’s an example of what the call link in your header will look like:

And that’s it! You’ve successfully added a click-to-call link in WordPress the super-easy way.
But if you’re still looking for ways to effortlessly improve your business, check out this guide on how to set up a free professional business email address for customers who prefer email rather than phone calls.

