A sticky header stays fixed at the top of the screen as visitors scroll down the page. This keeps your navigation menu visible at all times, making it easier for users to move around your site without scrolling back to the top.
Step 1: Add a Header Section
Open the page or template you want to edit in the SeedProd builder. Add a section that will contain your header elements — your logo, navigation menu, or any other header content.
Step 2: Open the Section Settings
Click the gear icon in the section’s purple toolbar to open its settings panel. Alternatively, open the Layout Navigation panel and click on the header section from there.
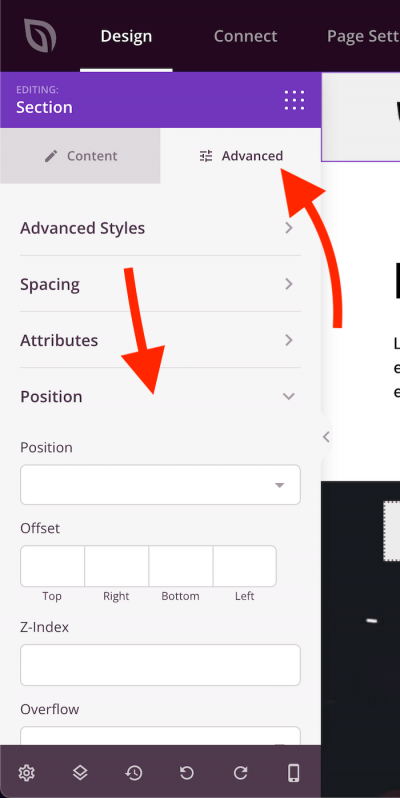
Step 3: Open the Position Panel
In the section settings, click the Advanced tab and then expand the Position panel.
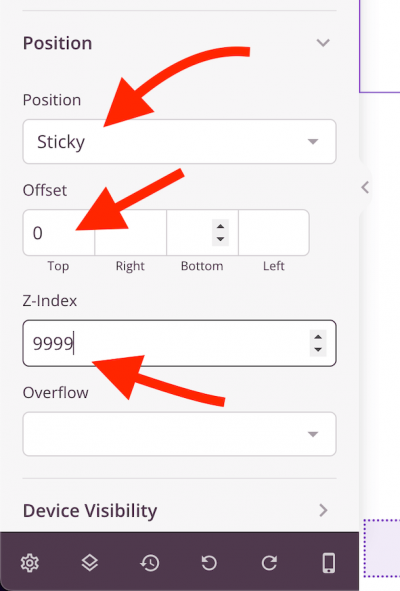
Step 4: Configure the Sticky Position
In the Position dropdown, select Sticky. Then configure the following values to ensure the header stays pinned at the top above all other page elements:
- Top Offset: Set to
0so the header sits flush against the top of the viewport. - Z-Index: Set to a high value such as
9999to ensure the header appears above all other elements on the page.
Step 5: Save and Preview
Click Save to apply your changes, then preview the page. Scroll up and down to confirm the header remains fixed at the top of the screen.
Your sticky header is now live. Visitors will always have your navigation within reach as they scroll through any page on your site — no matter how long the content is.