If the automatic update in your WordPress dashboard is not working, you can manually update SeedProd by downloading the latest plugin file and uploading it directly. This guide covers how to check your current version, where to download the update, and how to install it.
Step 1: Check Your Current Plugin Version
Before updating, confirm which version you currently have installed. There are two places to find this in your WordPress admin:
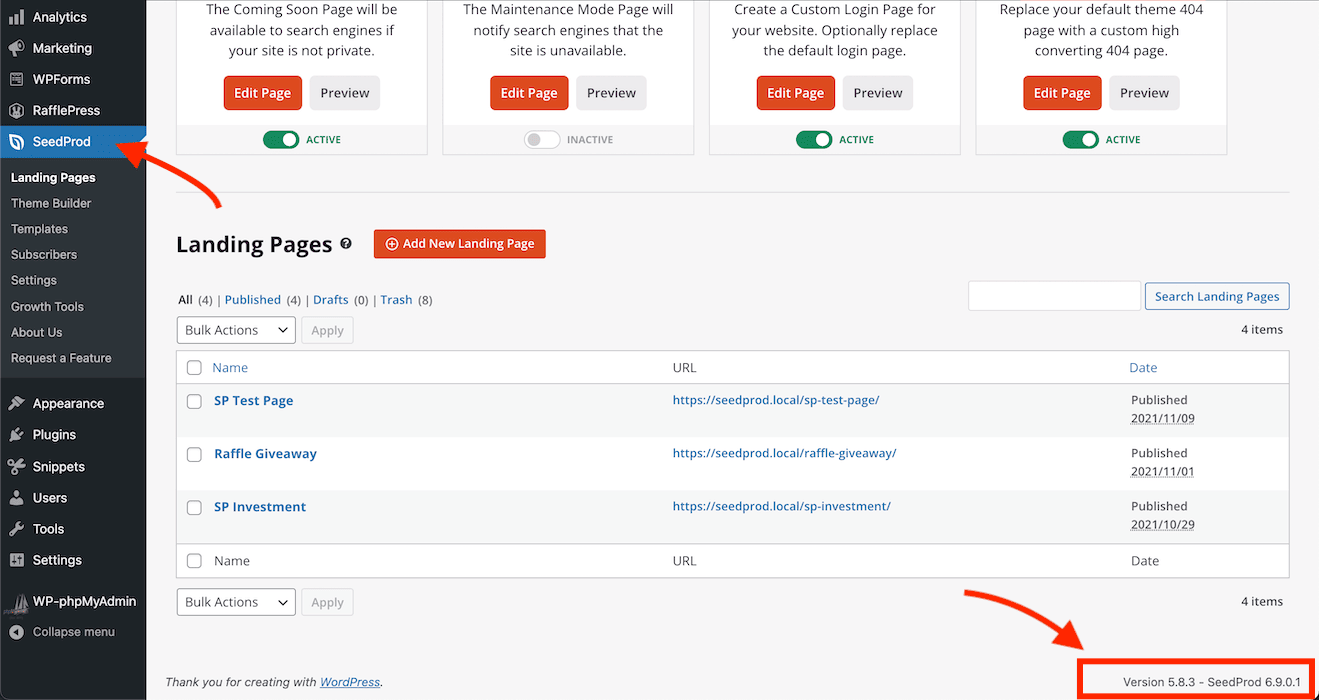
From the SeedProd dashboard: Go to the SeedProd dashboard page and scroll to the bottom. Both the SeedProd plugin version and your WordPress version are listed there.
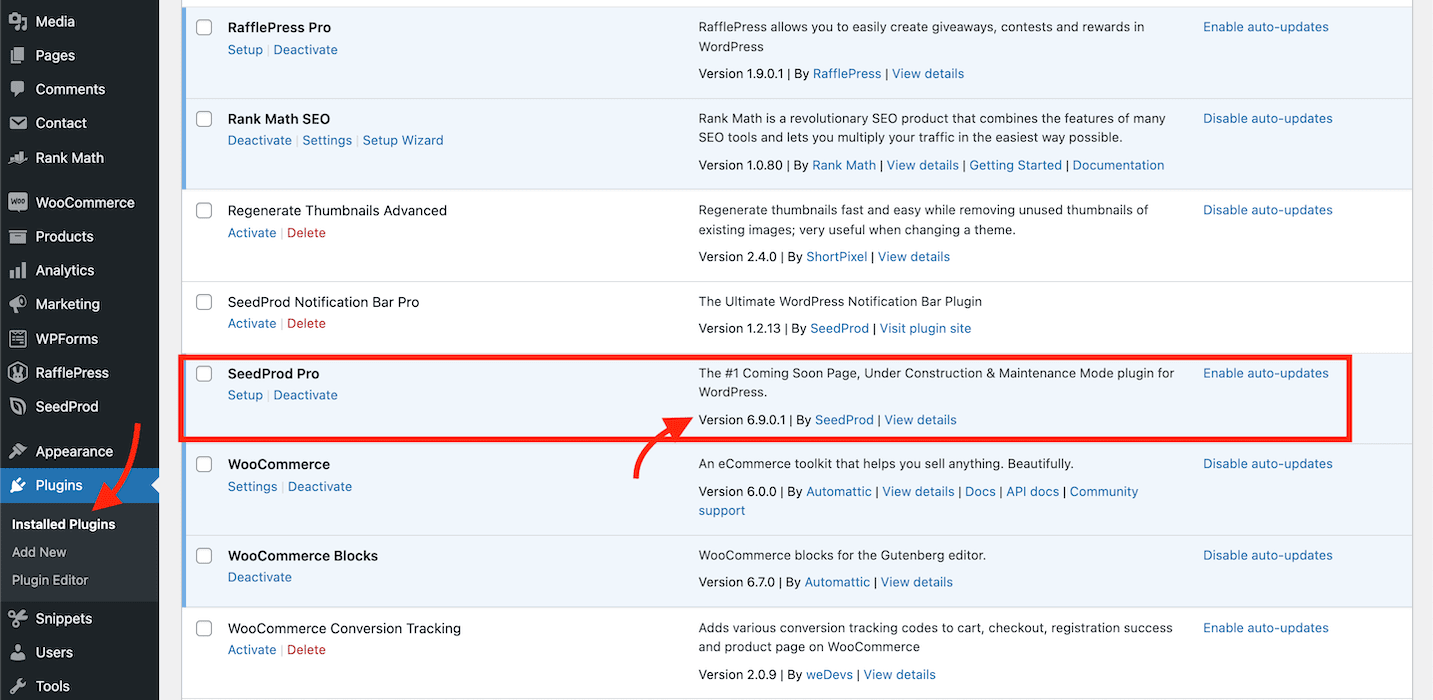
From the Plugins screen: Go to Plugins > Installed Plugins and locate the SeedProd entry. The version number is displayed in the plugin row.
Compare your installed version against the latest release on the SeedProd Changelog page to confirm an update is available.
Step 2: Download the Latest Plugin File
- Free users: Download the latest version of the SeedProd Coming Soon (Lite) plugin from the WordPress plugin repository.
- Pro users: Download the latest SeedProd Pro ZIP file from the Downloads page in your SeedProd account.
Step 3: Upload and Install the Update
- In your WordPress admin, go to Plugins > Add New and click the Upload Plugin button at the top of the page.
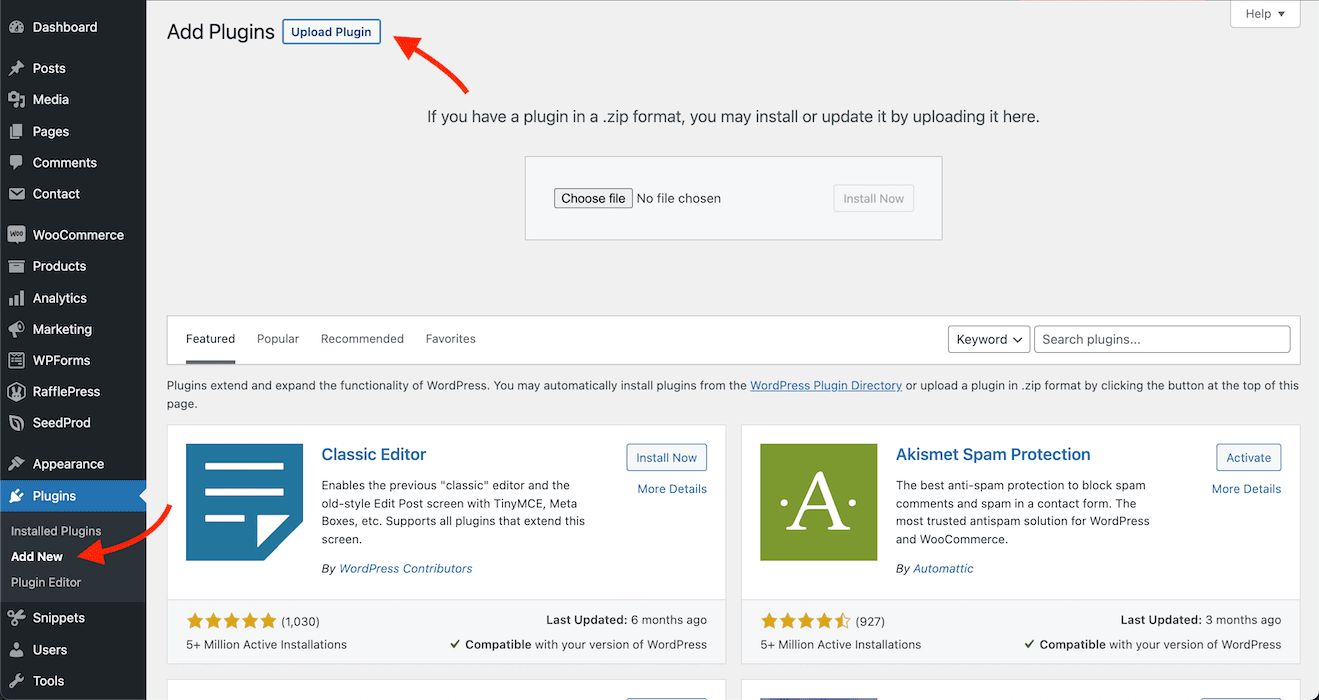
- Click Choose File, select the ZIP file you downloaded in Step 2, and click Install Now.
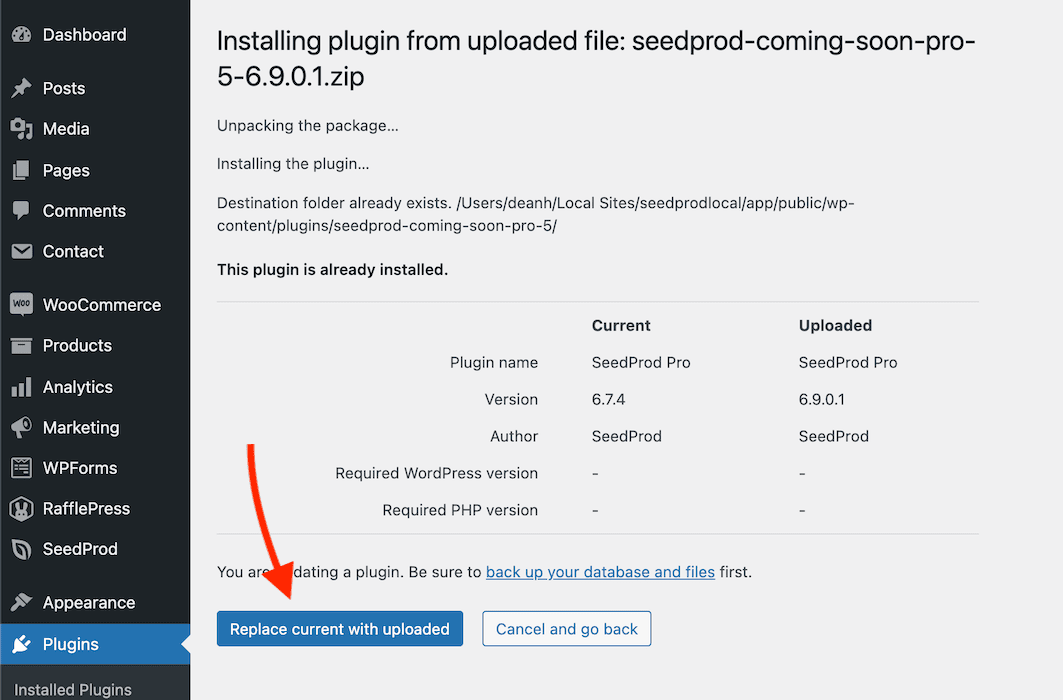
- WordPress will detect that SeedProd is already installed and prompt you to confirm the overwrite. Click Replace current with uploaded to complete the update.
SeedProd is now updated to the latest version. Return to Plugins > Installed Plugins to confirm the version number has changed. If you run into any issues during the update, contact the SeedProd support team for assistance.