Do you want to add a vertical navigation bar to your WordPress website?
It’s a simple web design feature one of our readers asked us about recently and one that makes it easier for visitors to browse your website. Luckily, it’s pretty easy to implement, resulting in more organized navigation and a better user experience.
That’s why in this guide, we’ll teach you how to create a vertical navigation bar in WordPress step-by-step.
目次
Why Use a Vertical Navigation Bar in WordPress
Vertical navigation bars make it easier for users to browse your website compared to horizontal menus. They use your site’s vertical space, allowing you to add an ordered or unordered list of links to sidebars and footers without looking cramped.
A good example of this is online stores.
Many eCommerce sites use vertical navigation to add lots of products without taking up too much space. This list-style-type of navigation links is also easy to scan, which is helpful for shoppers in a hurry.
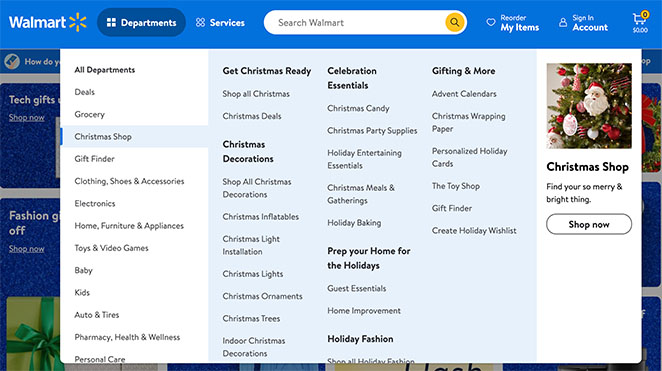
In a nutshell, well-designed vertical navigation bars can enhance your site’s appearance, usability, and user experience.
With that in mind, let’s learn how to add one to your WordPress site.
How to Create Vertical Navigation with SeedProd
Creating a vertical navigation bar in WordPress is a breeze with SeedProd, the best WordPress website builder and landing page plugin.

With SeedProd’s drag-and-drop builder, you can create custom WordPress themes and flexible web pages without writing PHP, Jquery, Javascript, HTML & CSS code. Plus, its Nav Menu block includes vertical navigation built-in.
First, you’ll need to install and activate the SeedProd plugin. If you need help, you can see our documentation on installing SeedProd Pro.
Note: With the free version of SeedProd, you can add a vertical navigation bar to individual pages. However, we’ll use SeedProd Pro for this guide to add a menu bar to our WordPress theme templates.
After activating the plugin and entering your license key, you’re ready to create a custom WordPress theme.
カスタムWordPressテーマの作成
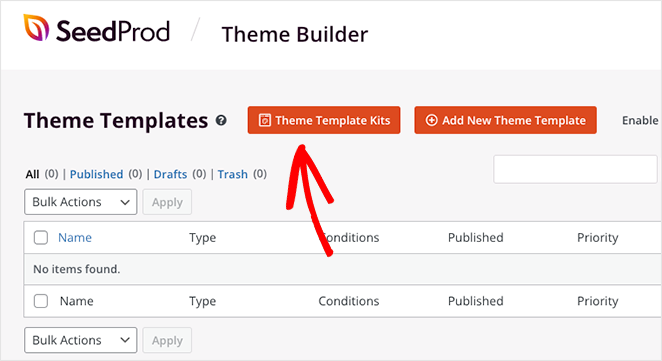
To create your theme, navigate to the SeedProd » Theme Builder page from your WordPress dashboard. On this page, you can choose a pre-made theme as a starting point. It will replace your existing theme with a custom responsive website design of your choice.
To do this, click the Theme Template Kits button.
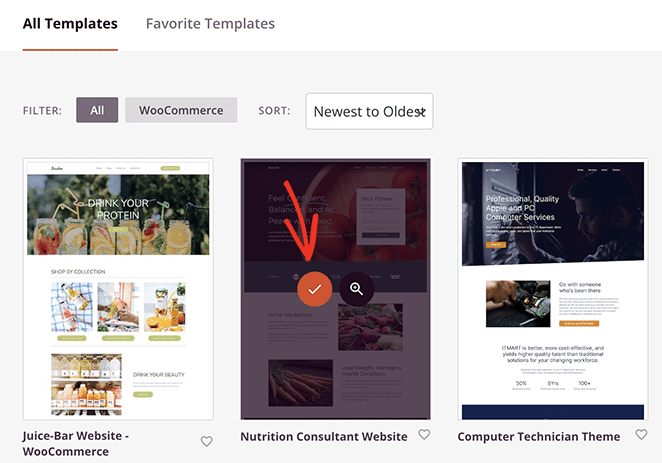
You’ll then see the themes library with designs for different website niches. Clicking the dropdown menu lets you filter them by popularity and type. Browse through them, then click the checkmark icon on any design to import it.
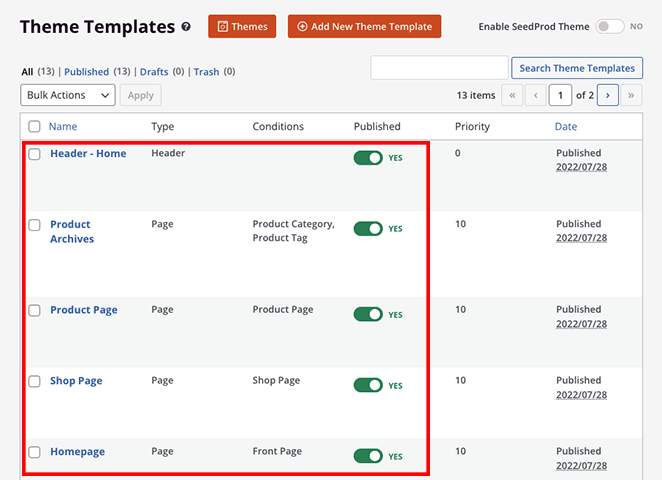
When you import a design, SeedProd will generate the templates that make up your theme. From there, you can edit each template and customize the design to suit your needs.
For all the steps, see our guide on how to create a custom WordPress theme.
Add a Vertical Navigation Bar to Your Templates
You can use SeedProd to add a vertical navigation bar to any of your theme templates. For this guide, we’ll add a menu to the ‘Blog Page’ template.
To do this, hover your mouse cursor over the template and click the ‘Edit Design’ link.
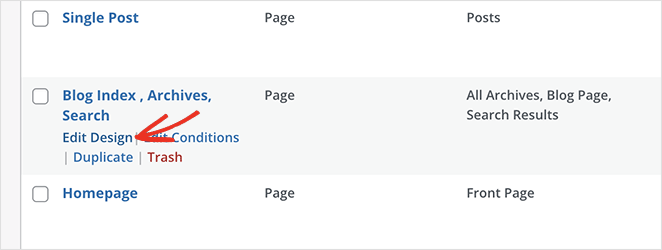
This opens the drag-and-drop page builder, with a live preview on the right and a block sidebar on the left.
Now, scroll down the blocks sidebar and look for the Nav Menu block. Once you find it, drag it to where you want to show your navigation menu, such as the sidebar.
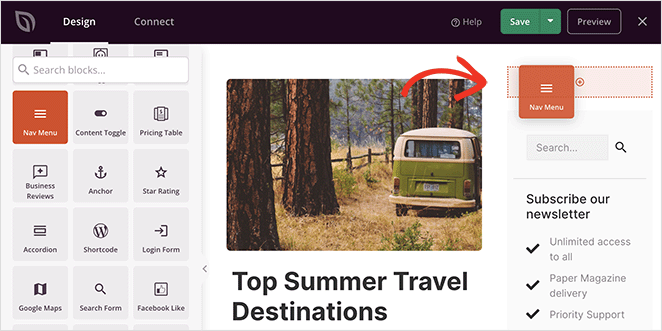
By default, the Nav Menu will only show an ‘About’ menu item. You can change this in the menu settings by clicking the block. It’ll then show the settings in the left-hand sidebar.
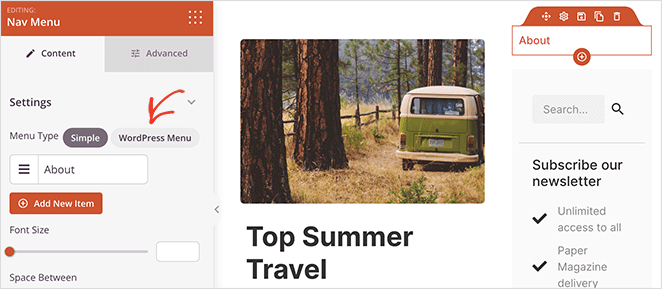
At first, the ‘Simple’ menu type is enabled, which lets you build your own navigation menu.
For this guide, we’ll select the ‘WordPress Menu’ type, which allows you to use your existing WordPress navigation menu.
The next step is to make the bar vertical instead of a horizontal navigation bar. You can do this by clicking the Advanced tab in the block settings and selecting the ‘Vertical’ list layout.
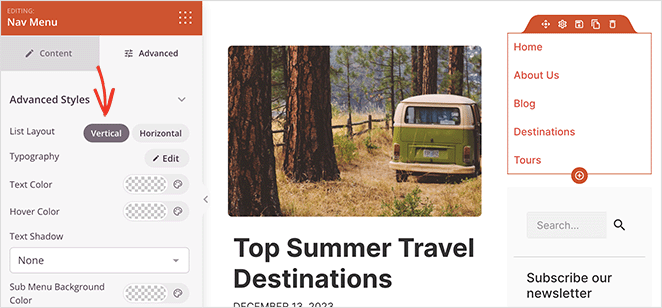
In the same panel, you can customize the menu colors, typography, background color, text-align setting, text decoration, and more.
When you’re happy with your menu, click the Save button to store your changes. You can repeat these steps for every template that requires vertical navigation.

4 More Ways to Create Vertical Navigation in WordPress
Creating a vertical navigation bar with SeedProd is a great choice if you’re using a theme builder plugin. But what if you want to use the tools already on your website?
Below, you’ll find four more methods for adding vertical navigation to WordPress.
Choose a Theme with Vertical Navigation Bar Support
Another way to add vertical navigation to your website is to choose a WordPress theme that supports it. Many WordPress themes have built-in support for vertical navigation bars, saving you a lot of time.
The key advantage here is simplicity: simply choose a theme that suits your aesthetics and let it do the heavy lifting for you. This might be the perfect solution if you’re not tech-savvy or short on time.
However, be aware that not all themes will offer this feature. When choosing your theme, go to its settings or documentation to see if it includes a vertical navigation bar.
For example, the default Twenty-Twenty-One theme doesn’t include vertical navigation. Meanwhile, the Astra theme supports an off-canvas hamburger menu and a footer menu that you can display stacked or inline.
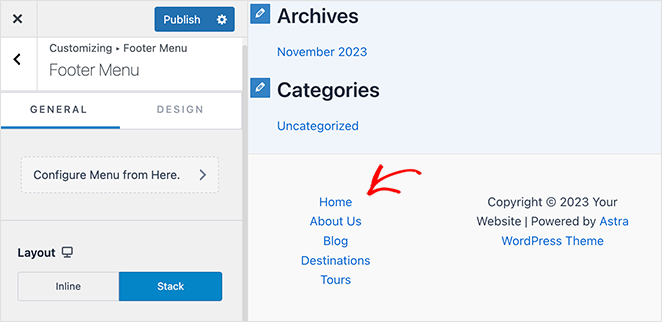
For help editing your menu, you can see our guide on how to edit the navigation bar in WordPress .
Add a Vertical Navigation Bar with Full Site Editor
Many WordPress themes are compatible with the WordPress Full Site Editor (FSE). They’re known as block-based themes and allow you to customize your theme visually.
To do this, navigate to Appearance » Editor from your WordPress admin. From there, click the navigation menu at the top of your website header.
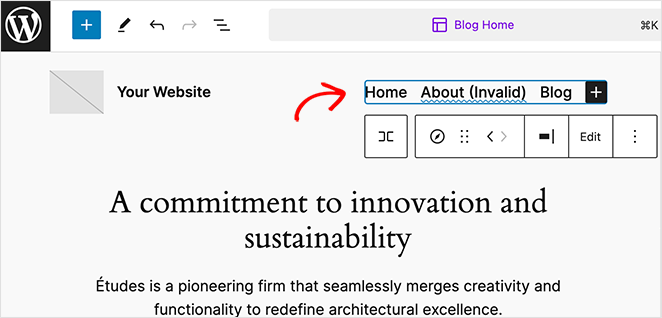
After clicking the menu, you’ll see several options in the side navigation panel. For example, if you click the Settings tab, there’s an option to change the orientation of the menu list items.
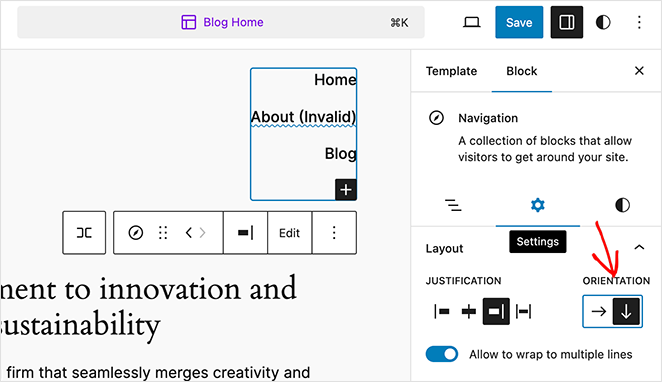
Click the downwards arrow to switch the menu to vertical navigation.
Now click the Save button to save your changes.
Add a Vertical Navigation Menu to WordPress Sidebar
You can easily add a vertical navigation bar to your sidebar using widgets if you don’t want to change your WordPress theme. This method is ideal if you don’t have a block-based theme installed.
First, make sure you’ve set up a navigation menu. Then head to Appearance » Widgets from your WordPress dashboard.
From there, click the (+) plus button and look for the Navigation Menu widget.
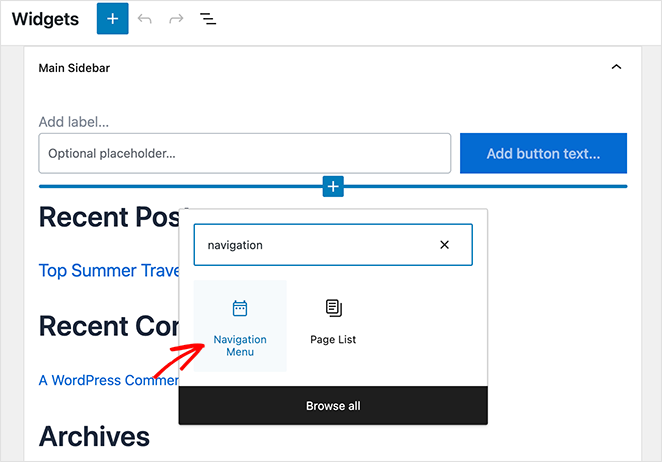
After clicking to add it to your sidebar, you can give the menu a title and choose which menu to show.
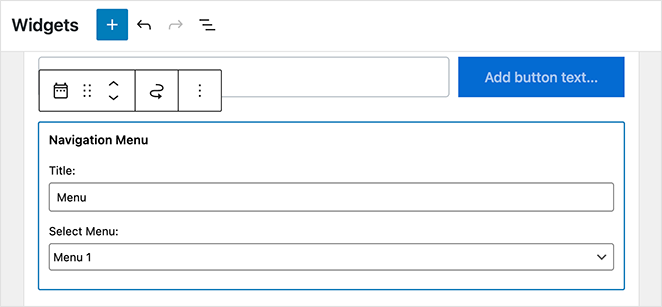
Now save your changes and preview your site to see the vertical side nav bar in action.

Create a Vertical Navigation Bar for Posts and Pages
You can take a similar approach to add vertical nav bars to your WordPress posts and pages.
First, edit or create a new post or page. Then, add the Navigation Menu block.
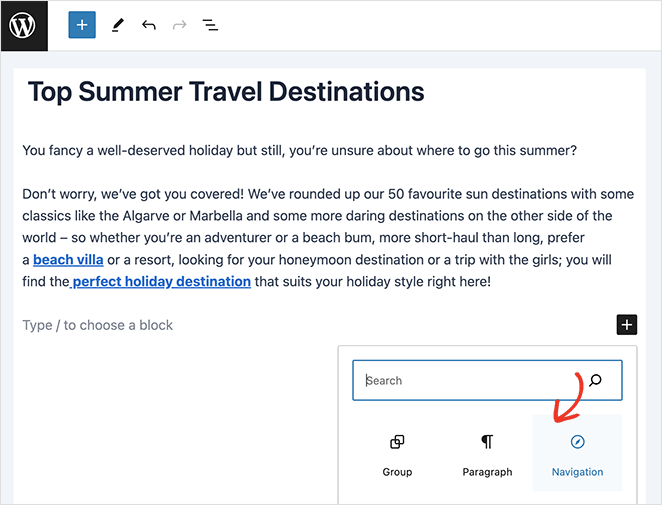
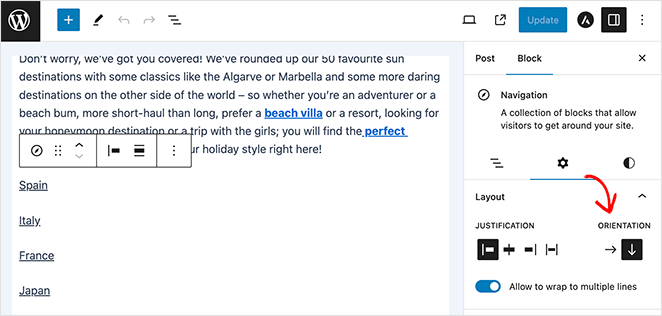
In the right-hand sidebar, click the down arrow to make the menu vertical, then save your changes.
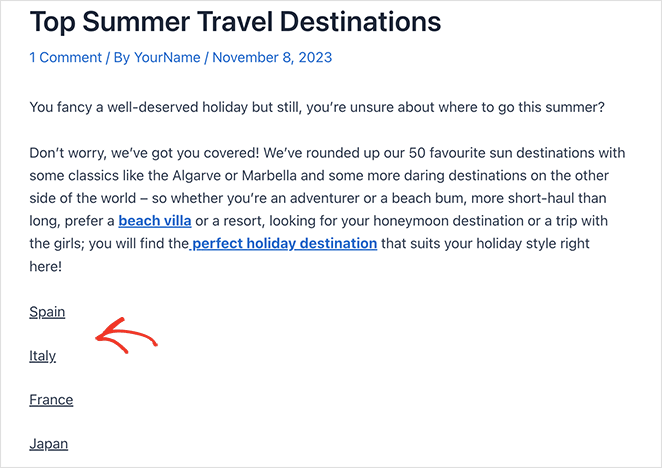
When you view the post or page, you’ll see a new vertical navigation bar.
Build Your Next Vertical Nav Menu
That concludes our guide on how to create a vertical navigation bar in WordPress. Now it’s your turn to build a more user-friendly navigation system for your website.
Remember, whether you go with SeedProd or choose from the other solutions we’ve covered, the goal remains the same. Enhance your reader’s experience, keep your site organized, and make navigating easy for visitors.
Happy designing!
For more navigation tips, see the following tutorial:
- WordPressのメニュースタイルをカスタマイズする方法
- How to Edit Mobile Menus in WordPress
- ランディングページのナビゲーションは死んだ:その理由がここにある
- How to Make a Landing Page Without Navigation
お読みいただきありがとうございました!ご質問やご意見がありましたら、お気軽にコメントをお寄せください。
また、YouTube、X(旧Twitter)、Facebookでも、ビジネスの発展に役立つコンテンツを配信しています。

