ポッドキャストを始める方法を知りたいですか?そして、自分のポッドキャストを始めるための最良のプロセスを知りたいですか?初めてのポッドキャストを始めるのは怖いものです。学ばなければならないこと、理解しなければならないことがたくさんあります。でも安心してください。
この記事では、WordPressでポッドキャストを始める方法をあらゆる角度から解説し、新しいリスナーを確保するために最適なポッドキャスト機器を選ぶヒントも紹介します。
始めよう。
ポッドキャストとは何か?
ポッドキャストは、人々がダウンロードして聴くことができる一連のエピソード形式のオーディオファイルである。つまり、トークショーのようなものだが、ユーザーはポッドキャストの録音をオンデマンドで聴くことができる。
多くの人が成功するポッドキャストを始めるのは、次のような理由からです:
- 起業家など、特定のテーマに関する深い知識を共有する方法として。
- インバウンド・マーケティングのチャネルとして活用するためだ。
- 潜在的なリスナーに対してパーソナル・ブランドを構築する方法として。
- ウェブサイトの収益化とSEO対策のため。
- あるいは単に人々を楽しませるためだ。
ポッドキャストはどのように機能するのか?
ポッドキャストを機能させるには、高品質のオーディオファイルと、ユーザーが購読できるフィードが必要です。これにより、最新のエピソードが公開されたときにダウンロードできるようになります。
初心者のポッドキャスターの多くは、ウェブサイト・プラットフォームとしてWordPressを使っている。WordPressにはブログ記事のRSSフィードシステムが組み込まれているからだ。
しかし、iTunes、Apple Podcasts、Amazon Music、Stitcher、Spotifyのようなリスニングアプリに自分のポッドキャストを接続して、何百万人もの人々が簡単に購読できるようにすることもできる(詳細は後述)。
ポッドキャストとは何か、そしてポッドキャストが実際にどのように機能しているのかがわかったところで、次はあなたのポッドキャストにぴったりのトピックを見つける方法を考えましょう。
ポッドキャストのニッチを定義する

ポッドキャストは超人気で、さまざまなトピックについてたくさんのポッドキャストが配信されています。だからこそ、ポッドキャストを始めるときは、ニッチを明確にして、群衆から際立ち、リスナーを奪い合う必要があるのです。
あなたのポッドキャストに最適なニッチとトピックを見つけるために、次の質問を自分に投げかけてみてください:
- ポッドキャストの名前は?
- ポッドキャストのリスナーは?
- どのようなテーマについて話し合うのですか?
- あなたのポッドキャストはどう違うのですか?
- ポッドキャストのフォーマットを教えてください。
- ゲストへのインタビューは?
- ポッドキャスティングの共同ホストはいますか?
これらの質問に対する答えをもとに、トピックのアイデアをブレインストーミングし、より具体的な分野に絞り込んでいきましょう。
例えば、あなたのポッドキャストが自己啓発に関するものなら、生産性、リーダーシップ、モチベーションなどのトピックに絞り込むことができます。この練習をすることで、後で新しいエピソードを企画し、焦点を維持するのに役立ちます。
でも、同じようなトピックのポッドキャストにはかなわないとお考えかもしれません。ご心配なく。陳腐に聞こえるかもしれませんが、あなたらしくあればいいのです。
もし、あなたが豊富な知識を持っているテーマであれば、あなた独自の洞察力、発言力、視点を使って目立たせることができる。結局のところ、自分自身に正直になることは、人々の共感を得ることにつながるのだ。
エピソードで何を話すかが決まったら、準備に取り掛かりましょう。
ポッドキャストを始めるための主なステップ
プロフェッショナルなポッドキャストを始めるには、プロセスをできるだけスムーズにするためにいくつかのものが必要です。
以下は、始めるための重要な要点である:
- ウェブサイト- 人々があなたとあなたのポッドキャストについてもっと知ることができます。
- 録音 機器- ポッドキャスト・エピソードを録音し、ポッドキャストの編集を行うためのものです。
- ポッドキャストのホスティングと公開ツール - ポッドキャストをオンラインで公開し、宣伝して購読者を増やすことができます。
それぞれのステップで何をすべきかを正確に知ってもらうために、最初から最後まですべてのプロセスを説明するのはどうだろう?
ステップ1:ポッドキャストのウェブサイトを作成する
最初のステップが最も重要です。それは、ウェブサイトホストを選び、ポッドキャストのウェブサイトを作成することです。
先に述べたように、WordPressはRSSフィード機能を備えているため、人気のある選択肢です。また、WordPressプラグインを使って機能を拡張したり、WordPressテーマを使って簡単にサイトをデザインしたりすることもできます。
さらに良いことに、WordPress.org(セルフホスト版)では、何の制限もなく無料でポッドキャストのウェブサイトを構築できます。つまり、WordPress.com(ホスト型バージョン)ではできない、ポッドキャストからの収益、スポンサーシップの受け入れ、アフィリエイトリンクの利用が可能です。
WordPress.orgとWordPress.comの違いについては、こちらをご覧ください。
WordPressは基本的に誰でも無料で使うことができる。必要なのは、ドメイン名とウェブサイトのホスティング費用だけです。
ドメイン名は、あなたのウェブサイトのオンライン・アドレスです。そして、人々がアドレスバーに入力することで、あなたを訪問することができる場所です。例えば、当社のドメイン名はseedprod.comです。
一方、ホスティングはあなたのウェブサイトのためのオンラインハウスのようなものです。 そして、すべてのファイル、画像、データベースが保存されている場所です。
ホスティングのコストは様々ですが、一般的な価格は月額約7.99ドルです。ドメイン名については、年間$14.99と少額で済みます。
今、私たちは、一度にすべてを取るためにこれがたくさんかもしれない理解しています。だからこそ、私たちはあなたのウェブサイトをホストするためにBluehostを使用することをお勧めします。
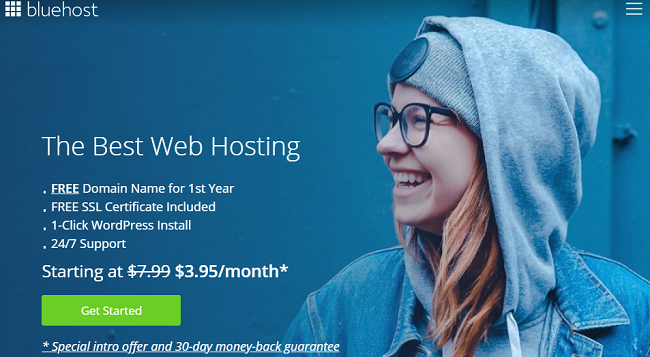
BluehostはWordPressが推奨する公式ホスティングプロバイダーであり、世界最大級のホスティングプロバイダーです。また、ドメイン名登録も提供しているので、ドメイン、ホスティング、WordPressウェブサイトのセットアップをすべて一箇所で済ませることができる。
Bluehostにサインアップしたら、WordPressブログを開始する方法については、次のステップバイステップの指示に従ってください。
しかし、別のホストを使いたい場合は、WordPressを インストールするためのガイドと一緒に、WordPressに最適なホスティングソリューションの他の提案をチェックすることができます。
ステップ2:ポッドキャスト・メディア・ホスティング・サービスをセットアップする
次のステップでは、良いメディアホスティングサービスを見つける必要があります。ポッドキャストの音声録音や音声ファイルはかなり大きく、サーバーリソースを大量に使用するため、サイトが遅くなるからです。
これを防ぐには、BlubrryやAnchor.fmのようなポッドキャスト用のメディア・ホスティング・プラットフォームを使えばいい。
このガイドでは、以下の理由からBlurbrryを使用する:
- WordPressサイトから簡単にポッドキャストを管理できるプラグインを使用することで、WordPressのポッドキャスティングに最適化されています。
- WordPressポッドキャスティングの巨大なコミュニティがあり、フォーラムで学んだり質問したりすることができます。
- iTunes最適化、メディアアートワーク管理、検索エンジン最適化SEOツールのような強力なツール一式が付属しています。
- ポッドキャスト・ホスティング・サービスのコンテンツ・デリバリー・ネットワークは、ポッドキャストをより速く確実に配信するのに役立ちます。
- ポッドキャスト・ディレクトリは、あなたが情報を広めるのに役立ちます。
そして、メディアホスティングプラットフォームを確保したら、次は必要な機器の種類について話す番だ。
ステップ3:ポッドキャスティング機器を選ぶ
では、ポッドキャストを始めるにはどんな機材が必要でしょうか?これは重要な質問であり、誰に尋ねるかによってさまざまな答えが返ってくるでしょう。
そのため、良いポッドキャスト用マイクから始めることをお勧めします。パソコンの内蔵マイクを使うと、音質が悪くなります。そしてこれは、ユーザーが今後のエピソードを聴くのを躊躇させることさえあります。
その代わり、音質が良く、セットアップが簡単なマイクを選ぶこと。ポッドキャスティング用マイクのブランドで最も人気があるのは、オーディオテクニカです。他にもいくつか人気のあるブランドがあります:
| マイク | 評価 | 長所 | 短所 | 現在の価格 |
| サムソン・ゴー | 最高のコストパフォーマンス | - ポータブル-シンプルな構造 | - 録画モードを誤って切り替えることがある | $39 |
| ブルー・イエティ | 最も汎用性が高い | - 4つの録音パターン●良質な作り●XLRインターフェース | - 面倒 | $118 |
| HyperX QuadCast | 最高のUSBマイク | - 簡単な操作 - ミュート通知 - 優れたビルド・クオリティ | - シビラントを強化 | $134 |
| ブルー・エンバー | 最高のスタジオマイク | - オフアクシスリジェクション●XLR用ポータブル●多用途 | - 48Vファンタム電源が必要●ポップフィルターが必要 | $99 |
マイクと一緒に、マイクアーム、ショックマウント、ポップフィルター、ヘッドフォンも必要でしょう。
ポッドキャスティングの機材をすべて集めたら、次のステップに進みましょう。
ステップ4:最初のエピソードを計画する

ポッドキャストの録音を始める前に、各エピソードの計画を入念に立てる必要があります。そうすることで、何を話すのか、どれくらいの長さにするのか、他に何を盛り込む必要があるのかを正確に把握することができます。
など、考慮すべき重要なことがいくつかある:
1.エピソードの内容
最初の2、3回はどんなエピソードにしますか?新しい紙か新しい文書に、主要な話の要点を概説する。
そして、各ポイントをさらに詳しく説明する。これは、後で少し説明する台本を書くのに役立ちます。
2.各エピソードの長さは?
ポッドキャストの長さは、20分の短いエピソードから1時間のセッションまでさまざまです。どれくらいの長さにするかは、盛り込むコンテンツやターゲットにしている視聴者によって異なります。
エピソードの長さには厳密なルールはありません。しかし、経験則として、一定の長さに合わせるために質の高いコンテンツを削らないこと。また、エピソードを長くするために長引かせないこと。
3.その他のメディア
最高のポッドキャストには、イントロとアウトロに音声が含まれており、バックグラウンドでソフトに再生され、あなたが話すポイントに劇的な効果を加えます。音声はまた、そうでなければ少し淡白すぎると感じるかもしれないポッドキャストに、興味と深みを加えます。
ライセンスフリーの音楽は、オンラインで豊富に入手できます。ただ、ポッドキャストで使用する前に、ライセンスの詳細をすべて確認してください。
無料のオーディオ・トラックをダウンロードできる場所をいくつか紹介しよう:
- Free Music Archive- 無料音楽とロイヤリティ・フリー音楽のNo.1ソース。
- YouTube Audio Library- ポッドキャスト用の無料音楽をブラウズしてダウンロードする場所です。
- SoundBible- 無料のサウンドクリップ、バイト、エフェクト。
4.脚本と絵コンテ
ポッドキャストのトピックについて詳細なアウトラインのテンプレートを作成することが重要な理由は前に述べました。しかし、スクリプトやストーリーボードがなければ、情報がどのように流れていくのかわかりません。
ポッドキャストのスクリプトをまとめると、エピソードの集中力が持続します。さらに、各トーキングポイントを次のトーキングポイントにシームレスに流すことで、よりプロフェッショナルに聞こえるようになります。
もちろん、時には台本から外れてもいい。あなただって人間なのだから、そういう個人的な趣向を凝らすことで、より親しみやすくなる。しかし、台本があることで、最終的にはより質の高いコンテンツになる。
すべての計画が終わり、あなたは最初のエピソードのレコーディングを始める準備ができています。その方法をご紹介しましょう。
ステップ5:最初のポッドキャスト・エピソードを録音する
最初のポッドキャストエピソードを録音するには、音声ファイルを録音・編集するためのポッドキャスト録音ソフトウェアが必要です。SkypeやZoomを使うこともできますが、音質は最高ではありません。

GaragebandやAdobe Auditionを使う人もいますが、ポッドキャスティングの録音・音声編集ソフトウェアで最も人気がありベストなのはAudacityです。無料で、オープンソースで、クロスプラットフォームなので、プロフェッショナルなサウンドのレコーディングができます。Windows、Mac、iOSでも使えます。
コンピュータに Audacity をインストールします。それを開いて、メニューバーからFile " Newを選択して新しいプロジェクトを作成します。
Audacity を使うとき、録音中にバックグラウンドで演奏する音楽をインポートすることもできます。これをするには、ファイル " インポートをクリックします。
そして、声の録音を開始するには、赤い録音ボタンをクリックします。これでポッドキャストの録音が開始できます。
また、Audacityを使った録音方法の簡単なビデオを以下にまとめました。
ポッドキャストの録音が終わったら、それをエクスポートする必要があります。ファイルサイズが小さく、品質が優れているため、MP3フォーマットで書き出すのが一般的です。
また、ほとんどのポッドキャストはシリーズで配信されるため、ファイル名の付け方にも気を配る必要があります。ファイル名にエピソード番号を使うのが良い方法です。
WordPressでポッドキャストを始めるとしたら、ファイル名をこのようにつけるだろう:
- SP001.mp3
- SP002.mp3
- SP003.mp3
その後、すべてのファイルを、ポッドキャストのエピソード録音専用の新しいフォルダに保存できます。
ステップ6:WordPressでポッドキャストを公開する
いくつかのエピソードを録音したら、WordPressでポッドキャストを公開する方法を学ぶ準備ができました。それでは、WordPressウェブサイトの管理エリアにログインしてください。
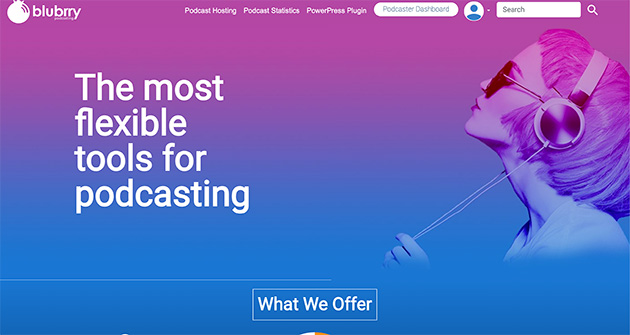
Blubrry PowerPress PodcastingプラグインはWordPressのリポジトリから無料でダウンロードできます。WordPressプラグインのインストール方法については、こちらのチュートリアルをご覧ください。
プラグインをインストールすると、WordPressの管理メニューにPowerPressのアイコンが表示されます。また、ポッドキャスティングファイルのホスティングにBlubrryを使っている場合は、アカウントとWordPressサイトをリンクするように設定する必要があります。
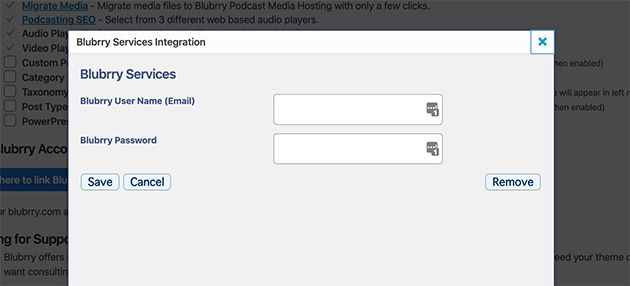
PowerPress " Settings をクリックして設定画面を表示し、青いボタンをクリックしてアカウントをリンクしてください。
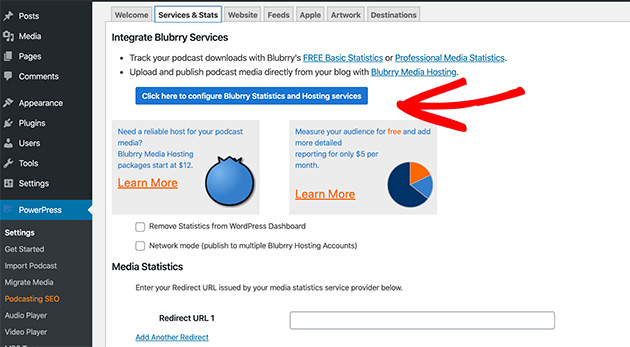
ユーザー名とパスワードを入力するポップアップが表示されます。
次に、設定ページで残りの情報を入力してください。これにはフィード情報、ショーの詳細、iTunesの詳細が含まれ、Appleタブでアクセスできます(これについては後述します)。
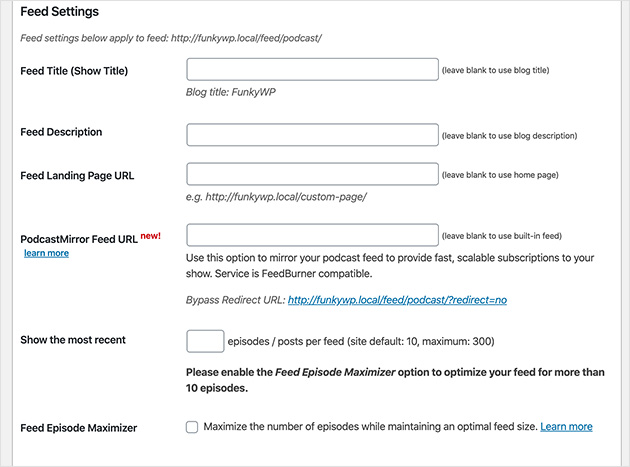
問題がなければ、「変更を保存」をクリックします。これであなたのサイトはポッドキャストを公開する準備ができました。
ステップ7:メディアファイルをホスティングサービスにアップロードする
ポッドキャストを公開する前に、オーディオファイルをメディア・ホスティング・ポッドキャスト・プラットフォームにアップロードしてください。この場合、それはBlubrryです。
Blubrryダッシュボードにログインし、新規メディアファイルのアップロードをクリックします。
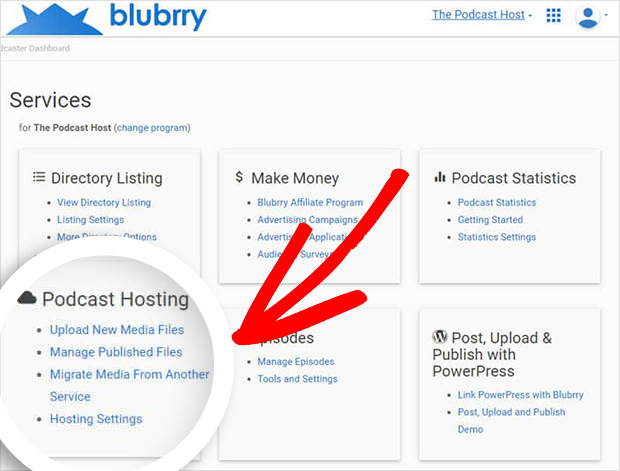
その後、別のページに移動しますので、そこで「新しいメディアをアップロード」ボタンをクリックして、ポッドキャストファイルをアップロードしてください。
このステップが完了したら、WordPressサイトでの使用に移ります。
ステップ8:最初のポッドキャストをワードプレスに追加する
WordPressに初めてポッドキャストを追加するには、まずFuseboxアカウントにサインアップしましょう。これにより、スマートポッドキャストプレーヤープラグインをダウンロードしてインストールし、WordPressでポッドキャストを美しく表示できるようになります。
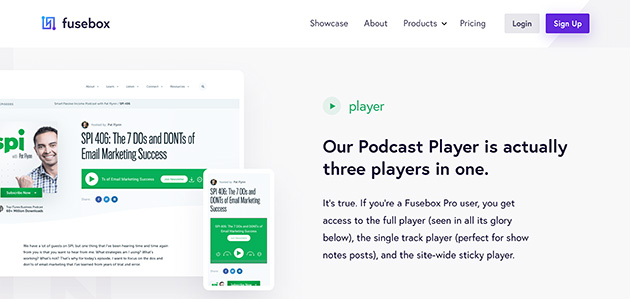
Fuseboxの無料版には以下のような特典があります:
- ポッドキャスト・プレイヤー
- モバイルフレンドリーデザイン
- 明るいテーマと暗いテーマ
- スマート・ショー・ノート・ツール
一方、プロバージョンにアップグレードすると、Eメールキャプチャーのサポート、カスタマイズ機能、ソーシャルメディア共有、ダウンロード可能なMP3、ポッドキャストのアートワークリンク、ポッドキャストのカバーリンクなどを利用できる。さらに良いことに、年払いで月8ドルしかかからない。
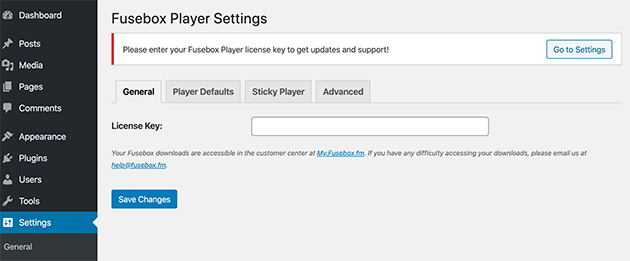
プラグインをインストールして有効化したら、設定 " Fusebox Playerにアクセスしてください。
有料版をお持ちの方は、ライセンスキーを入力してください。
次に、「プレーヤーのデフォルト」タブをクリックして、ポッドキャストの設定を行います。
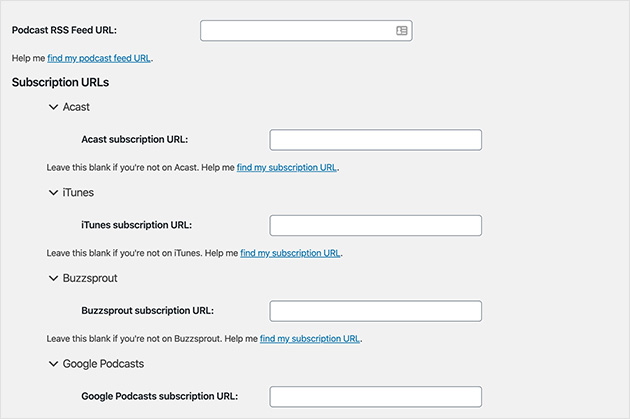
ここで、あなたのPodcastフィード、iTunes購読リンク、番組名とアーティストを入力する必要があります。まだiTunesにPodcastを登録していなくても心配しないでください。後でいつでもこのステップに戻ってくることができます。
また、Fuseboxには様々なデザインのカスタマイズ設定があります。ここでは、ハイライトカラー、背景、ボタンのスタイルを変更できます。
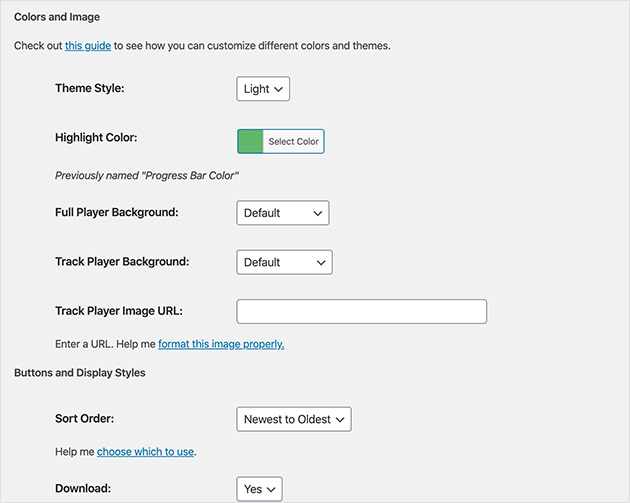
これらの設定に満足したら、Save Changesをクリックします。
PowerPress Podcastプレーヤーを無効にする
ポッドキャストの表示には優れたFuseboxプレーヤーを使用しているため、内蔵のPowerPressプレーヤーは必要ありません。
このプレーヤーを無効にするには、PowerPress " 設定に行き、ウェブサイトタブをクリックしてください。
ここで、PowerPress Media Playerを無効にするオプションをクリックする必要があります。

次に「 変更を保存」をクリックします。
WordPressの投稿にポッドキャストを追加する
これで準備が整いましたので、WordPressの新規投稿でポッドキャストを公開することができます。これを行うには、投稿 " 新規追加に進みます。
次に、右側のカテゴリー見出しの下に、あなたのポッドキャストにカテゴリーを付けます。ポッドキャストのエピソードをサイトの他のコンテンツから切り離しておくために、こうする価値があります。
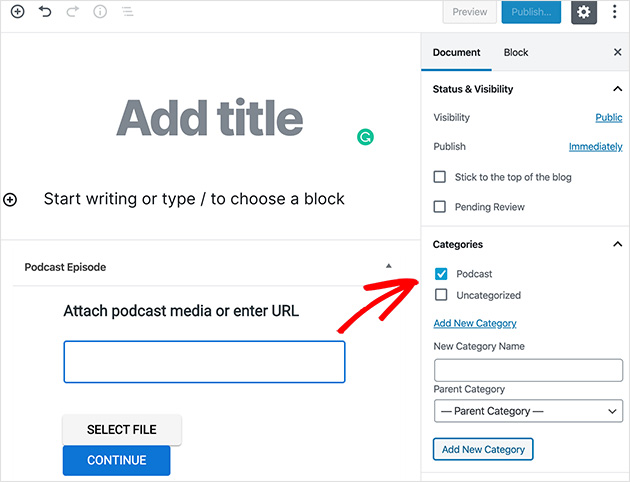
次にWordPressエディターの一番下にあるPodcast Episodeと書かれたところまでスクロールします。ここから、ポッドキャストのURLを貼り付けるか(Blubrryユーザーでない場合)、Blubrryアカウントからファイルを選択します。
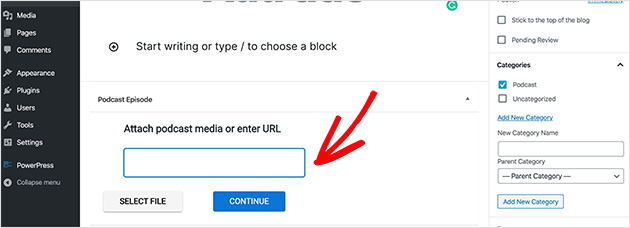
そうしたら、プラスアイコンをクリックして、投稿に新しいコンテンツブロックを追加します。
検索ボックスで「Fusebox」を検索すると、Fusebox Trackプレーヤーを追加するオプションが表示されます。これをクリックして投稿に挿入してください。
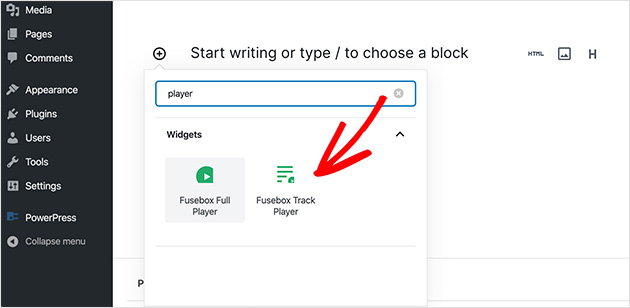
これにより、Fuseboxがショートコードとして追加され、ポッドキャストのエピソードを個別に表示できるようになります。ショートコードの設定は、右側のショートコードビルダーの見出しの下にあるショートコードの編集を クリックして行います。
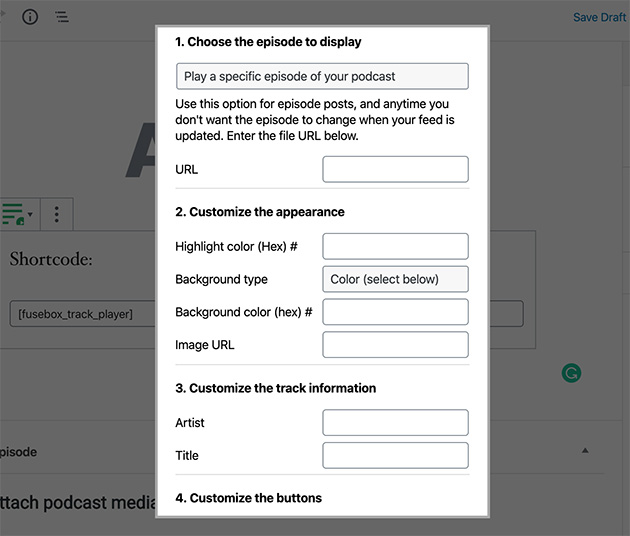
次にポッドキャストエピソードのURLを入力します。これには先ほどBlubrryが提供したメディアファイルのURLを使うことができます。入力が終わったら、Build Shortcodeをクリックすると、ショートコードがエディターに表示されます。
あとはPublishを押すだけです。ライブ投稿を表示すると、あなたのサイトにポッドキャストが美しく表示されます。
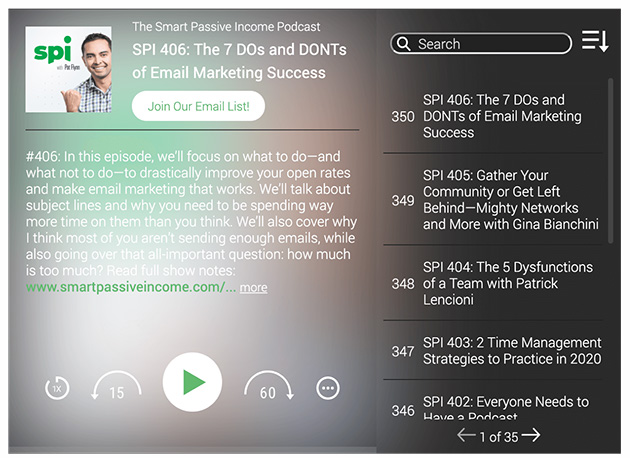
素晴らしい仕事だ!
ステップ9:iTunesでPodcastを配信する
WordPressでポッドキャストを設定したら、iTunesやGoogle Podcastsなどのソーシャルリスニングアプリで配信しましょう。そうすることで、購読者を増やし、リスナーを増やすことができます。

Podcastを投稿するには、iTunes Connectにアクセスします。URLフィードボックスにあなたのPodcastフィードのURLを入力し、「検証」をクリックします。
するとAppleが、投稿したカバーアートやポッドキャストの説明など、あなたのポッドキャスト情報のプレビューを提供します。問題がなければ、「送信」をクリックします。
アップルから確認メールが届くまで、しばらく待つ必要があるかもしれません。しかし、確認メールが届けば、ポッドキャストの配信とプロモーションの準備は完了です。
ポッドキャストを宣伝する1つの方法は、ポッドキャストのランディングページを作成するこのガイドに従うことです。
それで終わりだ!
WordPressで人気ポッドキャストを始める方法はお分かりいただけたと思います。
また、あなたのウェブサイトを会員制サイトにして、限定ポッドキャストエピソードを配信したい方は、WordPressのベスト会員制プラグインのショーケースをご覧ください。

