When I first needed to show my rates on a WordPress site, I didn’t want to mess with shortcodes or clunky plugins. I just wanted something simple, clean, and easy to update.
If you’re in the same boat, this guide will show you how to make a price list in WordPress without touching code. Whether you’re listing services, menu items, or packages, you’ll learn the fastest way to get it live using SeedProd’s drag-and-drop builder.
Let’s walk through it step by step.
Why Your Website Needs a Price List
Most shoppers check prices before they’re ready to buy. Adding a price list helps them compare your services and feel confident about their decision.
It’s especially helpful for freelancers, salon owners, and local businesses where transparency builds trust.
Price Lists Improve the User Experience
If visitors can’t find your pricing quickly, they’ll likely leave your site. A clear list helps them decide faster, and helps lower your bounce rate.
Don’t Worry About Competitors
Your competitors already know your pricing. What matters is how well your price list serves your customers. If your services are high quality, you’ll still stand out.
How to Make a Price List in WordPress
Price List vs. Pricing Table
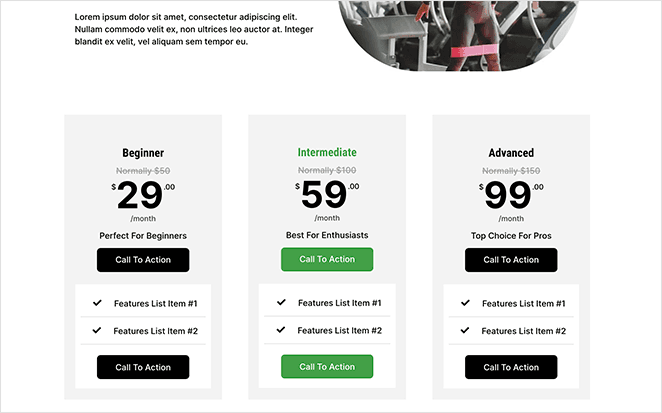
A pricing table shows multiple plans side by side. You’ll often see them on SaaS or membership sites.
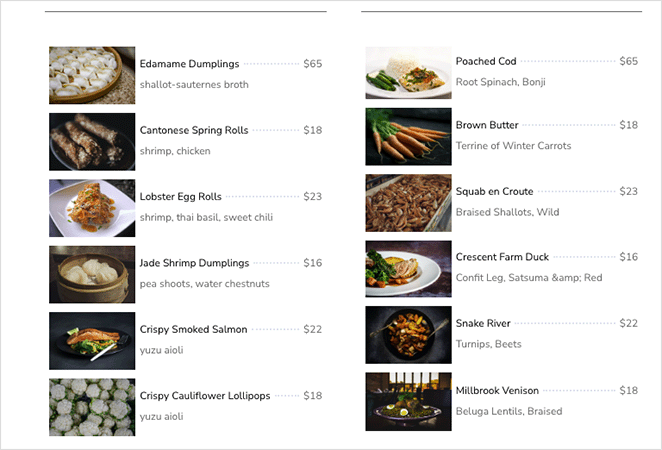
Price lists are simpler. They work better for restaurants, freelancers, or salons where you just want to list your services and prices clearly.
When to Use a Pricing Table
If you offer tiered pricing or packages, a pricing table is your best bet. Tools like Easy Pricing Tables make it easy to build one without code.
Why I Use a Price List Instead
I like using price lists for single-service businesses. They’re cleaner, faster to set up, and more flexible in where you can display them, like your homepage or service pages.
For this guide, I’ll use a drag-and-drop builder because it’s the easiest way to get your price list looking the way you want, and SeedProd is the best solution on the market.

SeedProd is the most beginner-friendly drag-and-drop page builder plugin for WordPress. Its intuitive interface makes creating custom WordPress page designs and layouts easy (no coding needed).
With its interactive block-based builder and pre-made templates, you can add a stylish price list to your website in minutes.
SeedProd also includes the following features:
- WordPress theme builder
- WooCommerce support for your online store
- eCommerce website templates
- Coming soon and maintenance modes
- Subscriber management dashboard
- Extensive customization options
- Email marketing integrations
- SEO plugin support
- And much more.
Follow the easy steps below to learn how to make a price list in WordPress with SeedProd.
Step 1. Install and Activate SeedProd
The first step is to go to the SeedProd website and download the plugin. You can choose from several pricing plans to suit your budget, but we’re using the SeedProd Pro version for this tutorial.
Next, install and activate the plugin zip file on your WordPress website. You can follow this post on how to install a WordPress plugin if this is your first time doing this.
Upon activating the plugin, go to the SeedProd » Settings page and paste your license key. You can find your license key in your SeedProd account under the Downloads section.
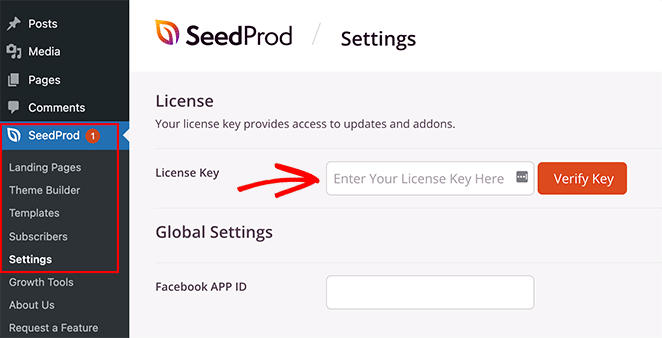
Now go ahead and click the Verify Key button.
Step 2. Choose The Theme or Landing Page Builder
There are several ways to customize your WordPress site with SeedProd’s page builder plugin.
You can replace your existing site design with a new one by building a custom WordPress theme. Or you can keep your current design and create a standalone landing page with the Landing Page Builder.
Regardless of your chosen solution, you can still use SeedProd’s Price List block to display custom price lists on your website because it uses the same page builder interface.
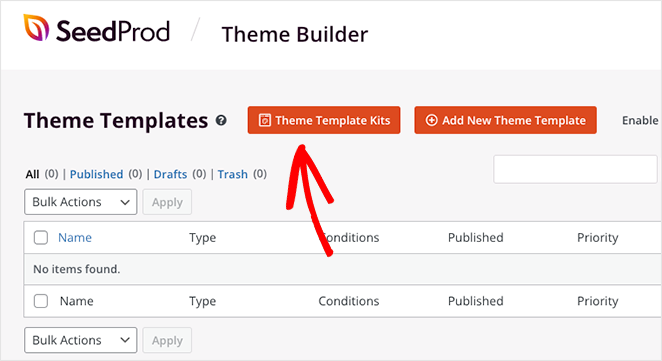
For this guide, we’ll choose the Theme Builder option, so navigate to SeedProd » Theme Builder and click the Theme Template Kits button.
Step 3. Select a Custom Template
On the next screen, you’ll see SeedProd’s library of premade website templates. They include all the features and pages you need to create a complete website and a professional design that you can customize easily.
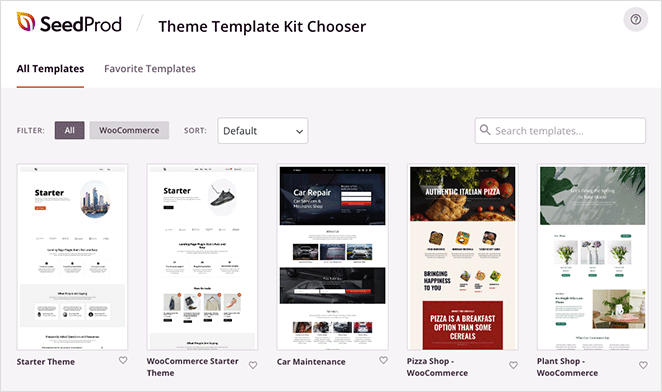
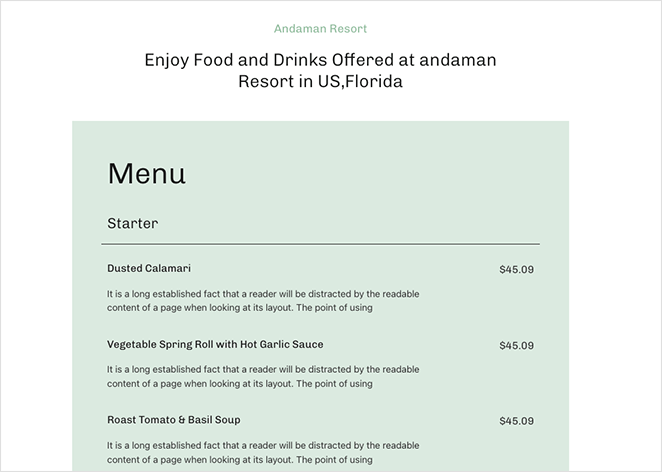
Click the magnifying glass icon on any template to preview the whole theme. For example, if you preview the Andaman Budget Hotel theme, you’ll see that the Dining page already has a simple price list that you can edit.
You can filter the template library to show only WooCommerce themes or click the dropdown menu to show the newest, oldest, or most popular themes first.
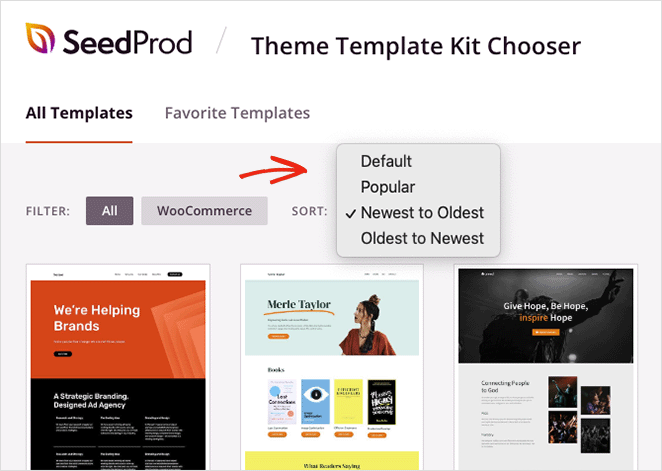
Once you find a design you like, click the checkmark icon to import it, which should take just a few seconds.

Now you’ll see the parts of your theme in the Theme Builder dashboard. You can edit any template by hovering over it and clicking the Edit Design link.
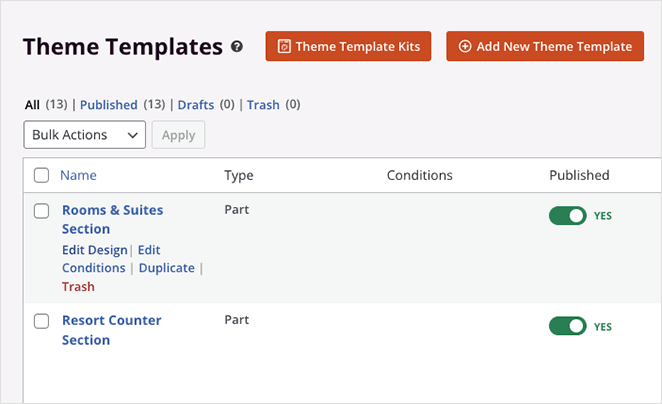
See our guide on creating a custom WordPress theme for more details on customizing your theme parts.
SeedProd will also create the pages from the theme demo for you to customize with its page builder. Simply go to Pages » All Pages, and you’ll see them in the list with “SeedProd” next to the page title.
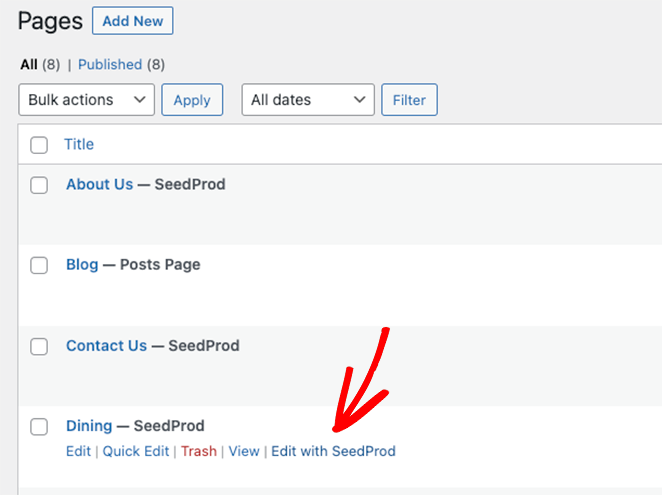
We’ll customize the “Dining” page to show you how to use SeedProd’s Price List feature. So hover over the page and click the Edit with SeedProd link.
Step 4. Customize Your Price List Page
When you open any page with SeedProd, you’ll see a layout like this:
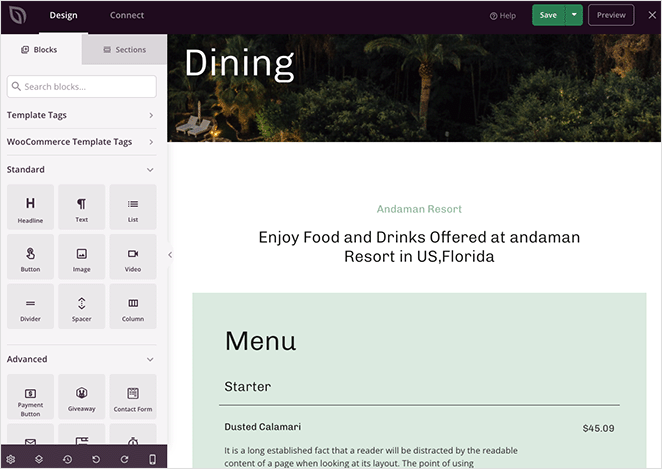
The page builder has WordPress blocks and settings on the left and a live preview of your design on the right. The blocks work similarly to the WordPress block editor (Gutenberg), where you can drag and drop new blocks onto your page and click to edit the contents in real time.
When you look at the menu on this design, you’ll see it’s made of headline and text blocks.
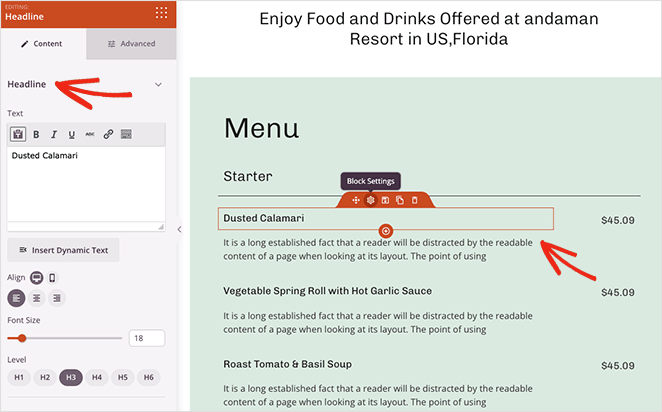
The Price List block is an easier way to display your menu items and their pricing. It automatically includes space for your item, description, price, and image and has many customization options.
From the left-hand panel, scroll to the Advanced section, find the Price List block, and drag and drop it onto your page.
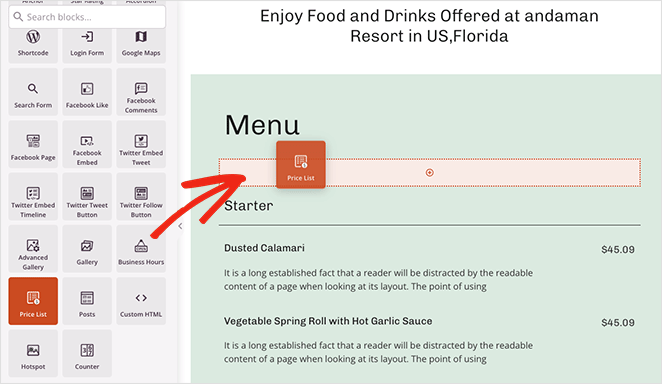
The block will add some filler content to give you an idea of how things will look. So, let’s go ahead and add some price list items.
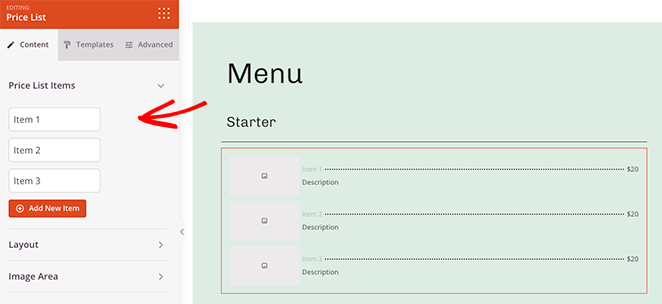
To do that, click the “Item 1” heading to expand it. Inside, you can add a title, description, and price, upload a photo, and even add a link to the individual product page.
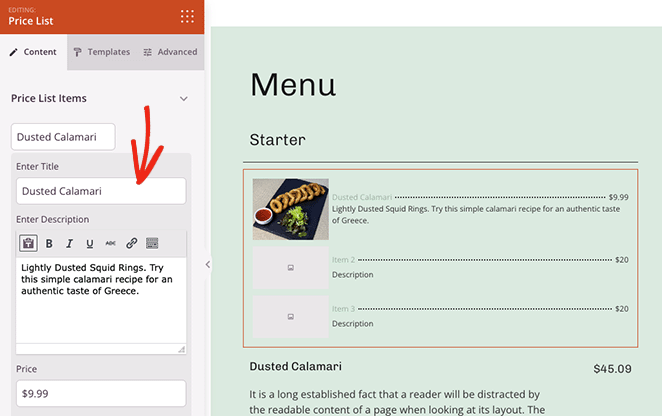
Repeat this step for every item on your price list.
After adding items to your price list, you can expand the Layout settings. In this panel, you can change the image and price position, choose a different price separator, and adjust the overall list alignment.
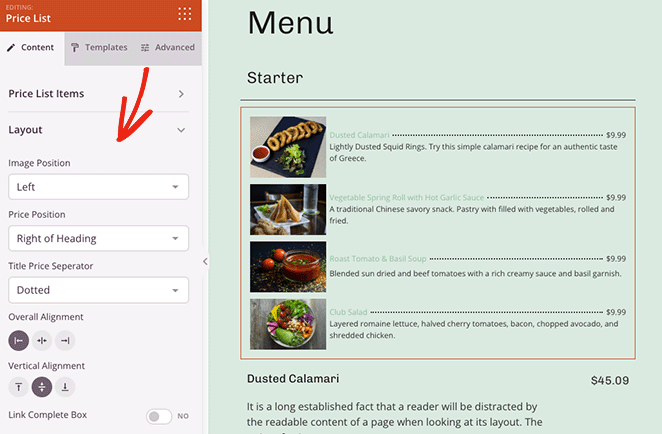
You can even link the full price box to the individual pricing page. Just click the toggle to the Yes position.
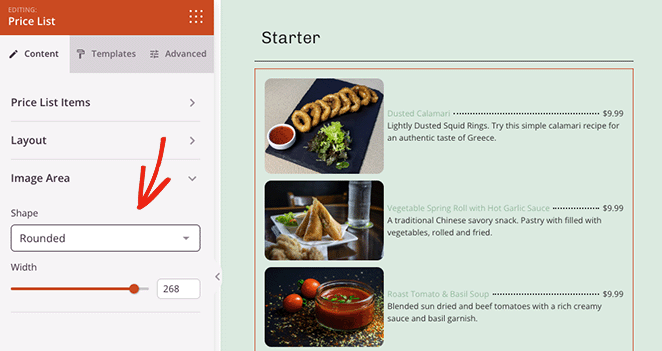
In the Image Area panel, you can control the size and shape of any images on your price list. The options include Default, Rounded, Circle, and Custom, where you can define your own image border-radius.
Now click the Advanced tab to see some extra styling options.
As you can see, this panel lets you control the typography, font size, and colors of individual items on your list.
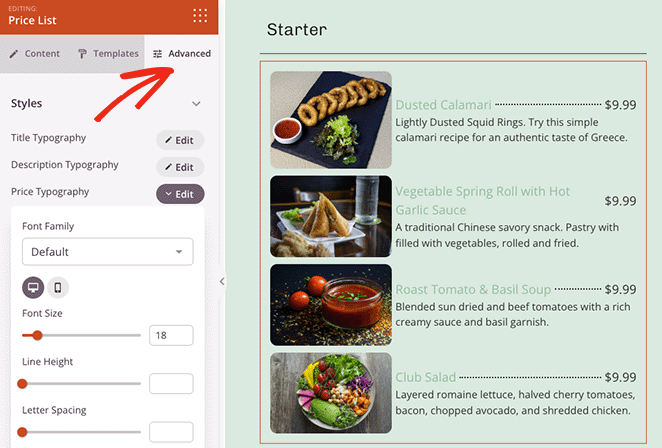
You can also adjust the spacing, borders, background colors, and visibility on desktop and mobile devices. And you won’t need to write custom CSS or HTML.
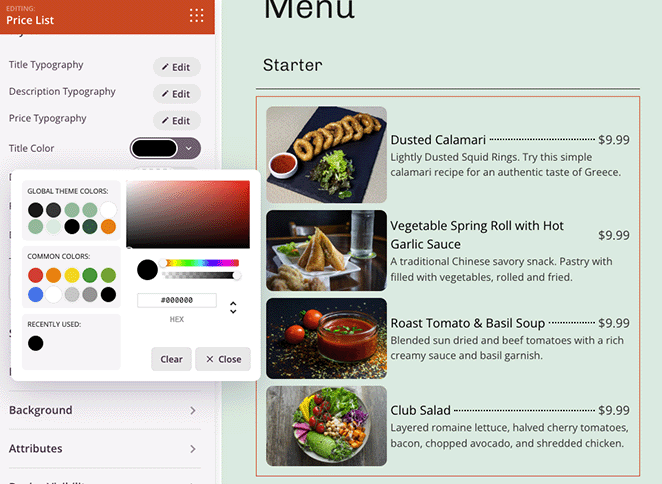
Simply point and click to add new styling.
Once you’re happy with your price list, you can remove the old filler content. To do that, hover over each column until you see a blue outline and click the trashcan icon.
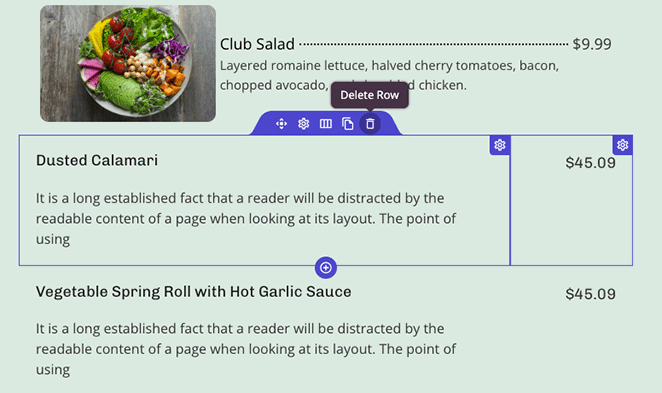
Do that for every element on the page you no longer need. Now go ahead and click the Save button in the upper-right corner of your screen.

Now that your pricing page is complete, you can edit and customize the rest of your WordPress theme.
Here are some handy guides that may help you with your customizations:
- How to Add a Button to Your Website Header
- How to Add Your Business Hours to Your Website
- How to Add Custom Social Icons to Your Website
Step 5. Publish Your Price List Page
When you’ve finished customizing your website, you’re ready to publish the changes on the front end.
First, make sure you’ve saved your changes, then click the X icon to exit the page builder and navigate back to the Theme Builder page in your WordPress dashboard.
From there, find the toggle that says “Enable SeedProd Theme” and turn it to the Yes position.

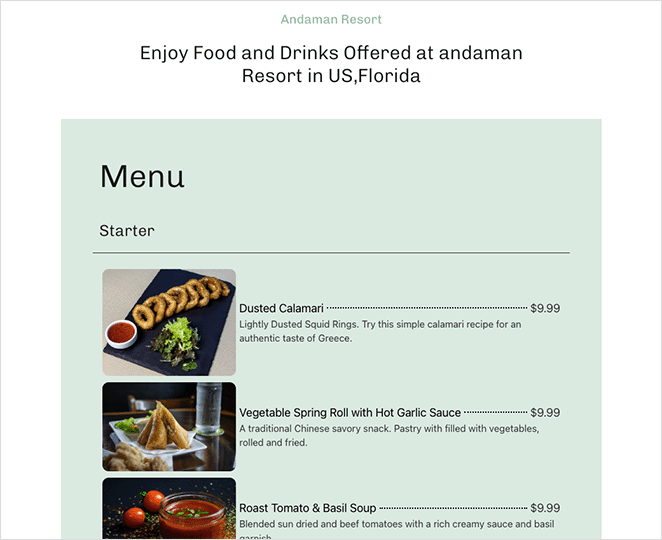
Now, you can visit your live website to see how your customizations look. Here’s the Dining page we customized with a new price list in this tutorial:
Frequently Asked Questions
That’s it!
We hope this article has helped you learn how to make a price list in WordPress.
SeedProd is the best WordPress plugin for customizing your website. You won’t need any extra shortcodes, widgets, or add-ons, just a straightforward, easy-to-use page builder that gets you up and running quickly.
Ready to make a custom WordPress price list?
You might also like this review of Elementor vs WPBakery vs SeedProd, so see how they compare.
Thanks for reading! We’d love to hear your thoughts, so please feel free to leave a comment with any questions and feedback.
You can also follow us on YouTube, X (formerly Twitter), and Facebook for more helpful content to grow your business.

