EDDチェックアウトブロックを使用すると、Easy Digital Downloadsストアの完全にカスタマイズされたチェックアウトページを作成できます。このブロックは、請求情報フォーム、カート概要、支払いオプションを含むすべてのチェックアウト要素を表示し、スタイリングとレイアウトを完全に制御できます。
適切に設計されたチェックアウトページは、閲覧者を購入者に変えるための最終ステップです。このブロックを使用すると、信頼を構築し、摩擦を減らし、ブランドに完全に一致するチェックアウトエクスペリエンスを作成できます。フォームフィールド、ボタン、カート表示、支払いセクションをカスタマイズして、カートから購入完了までのシームレスなパスを作成します。
EDDチェックアウトブロックをページに追加する
SeedProdページにEDDチェックアウトブロックを追加するには、次の手順に従ってください。
ステップ1:ブロックを追加する
デザイン > ブロック > Easy Digital Downloadsの下にあるチェックアウトブロックを、ページの目的のセクションにドラッグアンドドロップします。
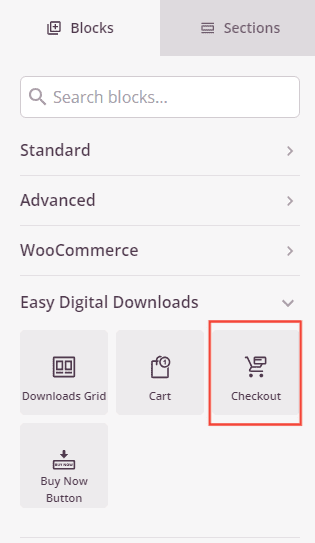
EDDチェックアウトブロックはEasy Digital Downloadsの下にあり、カスタムチェックアウトページを作成するために追加できます。
ステップ2:デザインをカスタマイズする
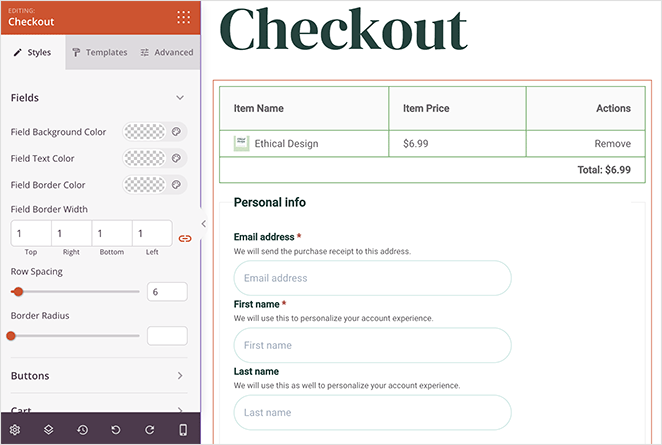
追加したら、EDDチェックアウトブロックをクリックして設定を開きます。スタイルタブで、チェックアウトページの表示のすべての側面をカスタマイズできます。
フィールド:
- フィールドの背景色:名前、メールアドレス、住所などのフォーム入力フィールドの背景色を設定します
- フィールドの文字色:フォームフィールドに入力されたテキストの色を選択します
- フィールドの境界線の色:入力フィールドの境界線の色を設定します
- フィールドの境界線の太さ:フィールドの境界線の太さを調整します(上、右、下、左)
- 行間:フォームフィールド行間の垂直方向の間隔を制御します
- 角丸:フィールドの角の丸みを調整します。値が大きいほど、より丸いフィールドになります
ボタン:
- ボタンのスタイル:「購入を完了する」などのチェックアウトボタンの視覚的な処理を選択します。オプションには、フラット(モダンなフラットデザイン)、2D(控えめな奥行き)、ビンテージ(クラシックな外観)、ゴースト(境界線付きの透明)、またはリンク(プレーンテキストリンク)があります
- ボタンの色:購入ボタンの背景色を設定します
- 角丸:ボタンの角の丸みを調整します
カート:
- カートの境界線の色:カート概要セクションの境界線の色を設定します
- カートの境界線の太さ:カートの境界線の太さを調整します(上、右、下、左)
- 背景色:カート概要エリアの背景色を設定します
- ヘッダーのタイポグラフィ:「注文概要」などのカートセクションヘッダーのフォントプロパティを制御します
- ヘッダーの色:カートヘッダーテキストの色を設定します
- アイテムのタイポグラフィ: カート内の商品名のフォントプロパティをカスタマイズします
- カートアイテムの色: カートアイテムのテキストの色を選択します
- リンクのタイポグラフィ: カートリンクのフォントプロパティを制御します
- カートリンクの色: カートセクションのクリック可能なリンクの色を設定します
支払いセクション:
- 背景色: 支払い方法セクションの背景色を設定します
- 支払い枠線の色: 支払いオプションの周りの枠線の色を選択します
- 支払い枠線の太さ: 支払いセクションの枠線の太さを調整します(上、右、下、左)
- 支払い枠線の半径: 支払いセクションの角の丸みを制御します
- ラベルの色: 支払いフィールドラベルの色を設定します
- ラベルのタイポグラフィ: 支払いラベルのフォントプロパティをカスタマイズします
- タイトルの色: 支払い方法のタイトルの色を選択します(例:「クレジットカード」または「PayPal」)
- タイトルのタイポグラフィ: 支払いタイトルのフォントプロパティを制御します
- 説明の色: 支払い方法の説明の色を設定します
- 説明のタイポグラフィ: 支払い説明のフォントプロパティをカスタマイズします
- 合計金額の色: 注文合計表示の色を選択します
- 合計金額のタイポグラフィ: 合計金額のフォントプロパティを制御します
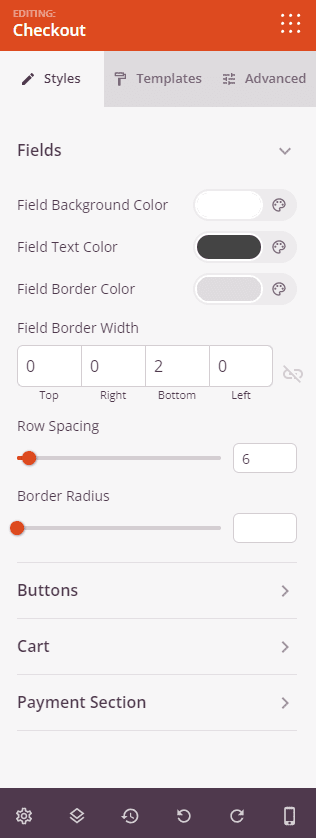
「スタイル」タブでは、フォームフィールド、ボタン、カート表示、支払いセクションの包括的なカスタマイズオプションを提供します。
ステップ2a: テンプレートスタイルを選択する
「テンプレート」タブでは、事前にデザインされたフィールドスタイルから選択して、チェックアウトフォーム全体の外観をすばやく変更できます。
- ライト入力フィールド、枠線なし入力フィールド、ワイド枠線入力フィールド、グレー入力フィールド、ダーク入力フィールド、下枠線フィールド、透明入力フィールド: 7つの異なるテンプレートデザインからフォームフィールドを選択します。それぞれユニークなスタイリングアプローチを備えています。各スタイルをプレビューして、ページデザインに最適なものを見つけてください。
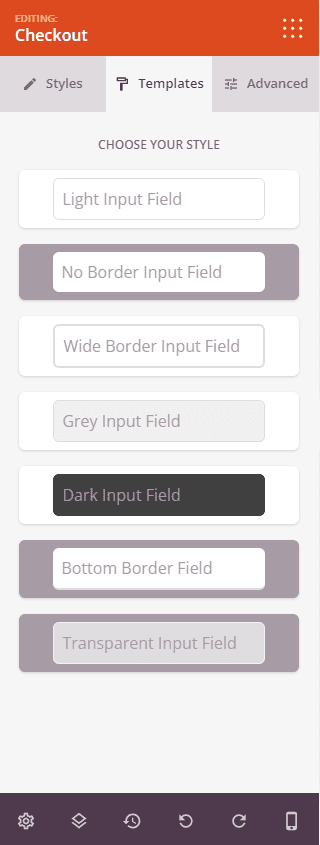
「テンプレート」タブでは、7つの事前にデザインされたフィールドスタイルを提供し、チェックアウトフォームの外観をすばやくカスタマイズできます。
ステップ3:高度なオプションを設定する
「高度な設定」タブでは、EDDチェックアウトブロックをさらにカスタマイズできます。
間隔:
- マージン: チェックアウトブロックの外側のスペースを制御します(上、右、下、左)。これにより、チェックアウトフォームと周囲の要素の間にどれだけのスペースが表示されるかが決まります。
- パディング: チェックアウトブロックの内側のスペースを調整します(上、右、下、左)。これにより、チェックアウトコンテンツとそのエッジの間に十分なスペースができます。
属性:
- CSS ID: チェックアウトブロックの自動生成された一意の識別子を表示します。このIDは、カスタムスタイリングまたはJavaScriptターゲティングのためにSeedProdによって自動的に作成されます。
- カスタムクラス: テーマまたはカスタムCSSから特定のスタイルを適用するために、カスタムCSSクラスを追加します。
- カスタム属性: チェックアウトラッパー要素に任意のHTML属性を追加します。各属性を新しい行に、属性名|値の形式で入力します(例:data-checkout|edd-checkout)。
デバイス表示:
- デスクトップで非表示: デスクトップ画面でチェックアウトブロックを非表示にします
- タブレットで非表示: タブレットデバイスでチェックアウトブロックを非表示にします
- モバイルで非表示: モバイルデバイスでチェックアウトブロックを非表示にします
アニメーション効果:
- 表示アニメーション: チェックアウトフォームが表示領域にスクロールインしたときに再生されるさまざまなアニメーション効果から選択します。オプションには、バウンス、フェードイン、ズームイン、ローテートインなどがあります。
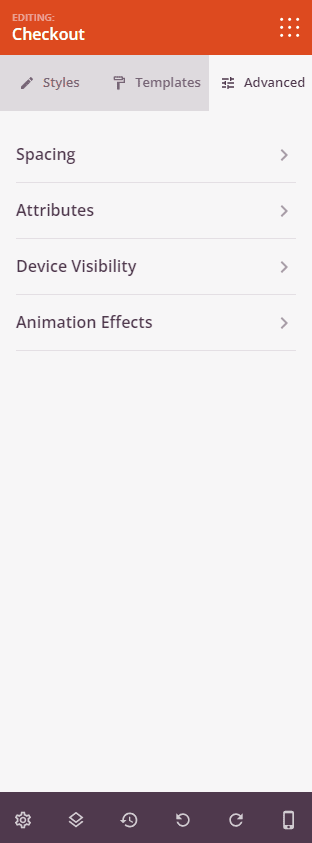
「高度な設定」タブには、間隔、カスタム属性、デバイスの表示設定、アニメーション効果のオプションがあります。
ステップ4:変更を保存
EDDチェックアウトブロックの設定と外観のカスタマイズが完了したら、必ず作業内容を保存してください。
ページにEDDチェックアウトブロックを追加しました!この包括的なチェックアウトソリューションは、プロフェッショナルでブランド化されたチェックアウトエクスペリエンスを作成するのに役立ち、顧客の信頼を高め、購入プロセスを合理化します。さまざまなフィールドスタイル、色、レイアウトオプションを試して、閲覧者を購入者に変え、デジタル製品の売上を最大化するチェックアウトページを作成してください。